Hail, Margarita!

Bob Joyce

blog - finished drink

As one of the male members of this blog community, I have had a certain amount of pressure recently to contribute a post. I didn’t have a legitimate excuse like Justin, who’s up to his eyeballs in house renovations, or Stewart, who simply stated that he was on a warship in the Atlantic. (I’m not really sure what that has to do with anything, but we do have to support our troops, so I guess he gets a pass.)

No, the real reason I hadn’t submitted a post was that I couldn’t think of anything I could do or offer that was food-related that would make for an interesting post. Then, one night, while I was sipping on that frozen concoction that helps me to hang on, it came to me: if there’s one thing for which I have gained a degree of notoriety within the family, it’s that I make a pretty darned good frozen margarita, if I do say so myself.

The history of the frozen margarita is somewhat unclear. It’s a relatively modern drink, as none of the versions of its origin dates it prior to 1940. According to Wikipedia, the most common version has the drink being first served by a bartender in Ensenada, Mexico, to Margarita Henkel, the daughter of a German ambassador who lived nearby, and he named it after her for being the first person to taste it. Other versions of the drink’s origin exist that also seem plausible. For current generations, however, I believe the drink owes much of its popularity to Jimmy Buffett’s song “Margaritaville,” which appeared on his 1977 album Changes in Attitudes, Changes in Latitudes – one of his best ever, in my humble opinion.

Contrary to what some might believe, I was not present at the unveiling of the first margarita ever served, whenever that might actually have occurred. My own history with the drink is much more recent. The first recollection that I have of ever having a frozen margarita was in April 2004. It’s possible that I had one before then; if so, it clearly wasn’t as memorable as this one.

Sharon and I were travelling to San Antonio for a business conference. After a tiring trip that started with a 4:00 a.m. wake-up to catch the pre-dawn flight out of Kingston, we arrived in San Antonio mid-afternoon. A 40-minute bus ride later, we were dropped off outside the Hyatt. And there, waiting for us in the outdoor courtyard, was a Hyatt bartender with pitchers full of frozen margaritas. What a wonderful sight, and welcome to the Lone Star State!

Back in Canada, we decided to make the concoction at home. As with most things in the kitchen, I turned to Sharon for help with the instructions. Since then, I have tweaked the recipe somewhat, and here it is.

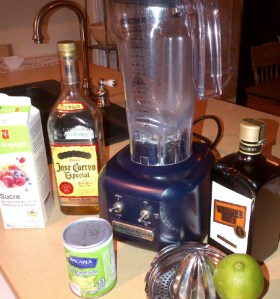
blog - Margarita ingredients

Ingredients and directions

  • 1 can Bacardi Margarita Mix
  • About 24 regular ice cubes
  • About 1 tablespoon sugar
  • Juice of 1 lime
  • About 6 oz. tequila
  • About 2 oz. triple sec
  • Margarita glasses – not essential, but preferred
  • Salt to rim the glasses
  • Blender

Our blender has a 48-ounce jar, so this will provide four 12-ounce drinks.
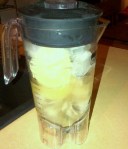
blog - margarita blenderIt is essential to have a powerful blender, as you’ll be crushing a lot of ice.I learned the hard way about needing a powerful motor when I blew out Liv’s favourite red Hamilton Beach blender several years ago. If your blender isn’t powerful, add the cubes in stages, about a third at a time. If you are adding the ice all at once, I have found adding half of the ice cubes, then the margarita mix, followed by the remainder of the ice, works well. Don’t throw out the can, as you will need it later.

Next, add about a tablespoon of sugar – we use the President’s Choice organic sugar in the carton. This is a personal preference, so you might like more or less than this amount. I then add the juice of a whole lime, more if the lime is small or on the dry side. Again, this is a matter of preference as to the amount.

Now add the tequila and the triple sec. I tend to use Jose Cuervo Gold, but I have tried other brands. If you have extra-nice tequila, save it for sipping, as the beauty of the smoothness will get lost in the frozen blend. I use the empty margarita mix can to measure, adding three-quarters of a can of tequila, and then one-quarter of a can of triple sec.

To rim the glasses, slice into the edge of one of the lime halves that you’ve already juiced. Slip the notch over the rim of the glass and moisten the entire rim. The proper way to salt the rim is to angle the glass into the salt container and rotate the glass until it’s salted. I’ve never mastered this technique, so I place the top of the glass straight down into the container and half-turn the glass.
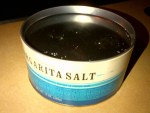
Blog - margarita saltFinding a good margarita salt is important. We don’t like flavoured salts, but you do want a salt that adheres well to the glass. We use the Williams-Sonoma brand, but it is getting harder to find. The Toronto store didn’t have any the last time we checked, but you can still find it at Williams-Sonoma in the States, or by shopping online.

Now you’re ready to go. Blend the ingredients until you have a smooth consistency, pour and enjoy! 

Bob lives and has learned to love adventurous eating in Kingston, Ontario, just a short drive and a thousand flavours from his childhood home in Brockville, where black pepper was exotic.
Welcome to our family’s discussion forum on food. If you’d like to submit a post, please consider yourself family, and email us at familyfoodforum@gmail.com.

    After a good dinner, one can forgive anybody, even one’s own relations.”

– Oscar Wilde, A Woman of No Importance

Parsnip biscuits

Olivia Schneider

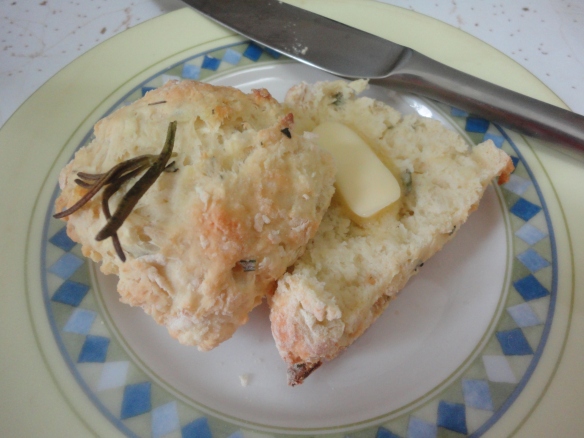
blog parsnip biscuits finished product

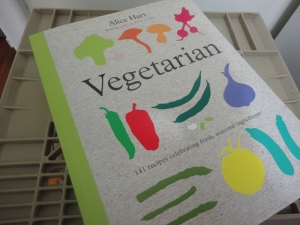
When I packed up my old apartment, I got rid of some cookbooks I felt I’d outgrown. They were the type of cookbooks that explain in great detail how to cook pasta noodles. As I went through all my cookbooks, I realized that a lot of my vegetarian cookbooks are very simple and borderline boring. I’m all for letting the natural flavours of food be the focus, but I also think that too often eating vegetarian is limited to eating dishes that are a little lacklustre.blog parsnip biscuits cookbook

Recently, I bought a new cookbook called Vegetarian by Alice Hart. I was flipping through it in Chapters when I saw this biscuit recipe. I took a picture of the recipe on my phone (I know…bad girl!) with no intention of buying the book. As I continued to flip, I kept seeing recipes that looked delicious. Taking one picture was bad, but I felt that taking twelve was really inappropriate. So I bought the book, and I absolutely love it. The book itself is beautiful, and the recipes are great. They’re not hard to make, but they’re a little more complex in flavour than those in some other vegetarian cookbooks I own.

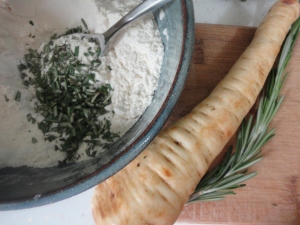
blog parsnip biscuits ingredients

Ingredients

1 ¾ cup white flour

1 ½ cups grated parsnip (I used one large parsnip)

2 1/3 teaspoons baking powder

1 tablespoon chopped rosemary

Salt (to taste)

2 eggs

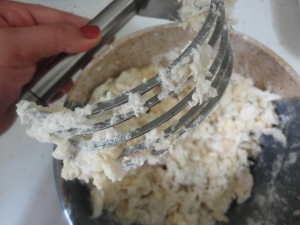
2 tablespoons milkblog parsnip biscuits dough

Directions

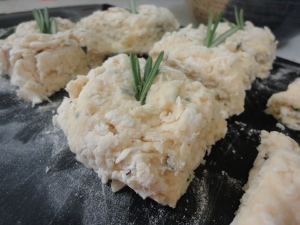
Preheat the oven to 375 degrees F. Mix the flour, baking powder, rosemary, salt and parsnip together. Beat the eggs and milk together. Add the wet ingredients to the dry and use a pastry cutter to mix everything together. Don’t over mix it! Then shape the dough into a rectangle and use a sharp knife to cut the large rectangle into smaller biscuits. Place a rosemary sprig into the centre of each biscuit. Cook for about 20 minutes.

blog parsnip biscuits ready for oven

Olivia lives in Halifax, Nova Scotia, where she enjoys making fast-but-good meals on a budget, and exploring new restaurants and recipes.
Welcome to our family’s discussion forum on food. If you’d like to submit a post, please consider yourself family, and email us at familyfoodforum@gmail.com.

    After a good dinner, one can forgive anybody, even one’s own relations.”

– Oscar Wilde, A Woman of No Importance

Corn pancakes: a year-round taste of summer

Sharon Jessup Joyce

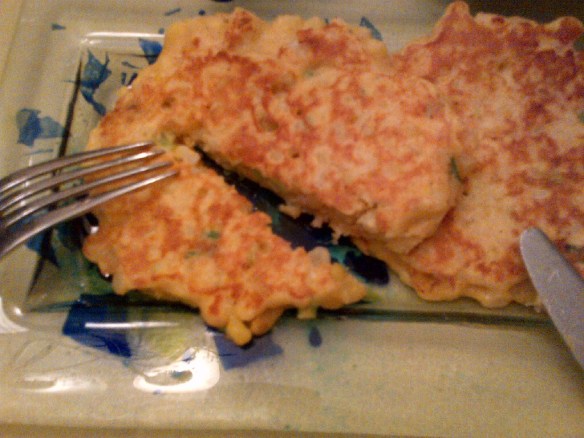
Blog - corn pancakes close-up

We are corn connoisseurs at our house, preferring the fuller flavour and firmer texture of golden corn varieties. Bi-coloured corn, often and incorrectly called Peaches and Cream (only one of many bi-colour varieties is Peaches and Cream), is just a little wimpy for us.  From early August to mid-September, crops permitting, we buy corn at our Saturday farmers’ market, eating some right away and freezing the rest in two-cup amounts. We even have a ranking system, based on how good each batch tastes right out of the pot: good corn (for chowder and chili); better corn (for corn pudding and pancakes) and best corn (reheated and served as a side dish as is). One year we had a batch Adrian labelled Ambrosia, so we must have decreed that it was even better than the already-labelled best corn.

Is our home-frozen corn really better than commercially-frozen stuff? Yes it is. And a lot cheaper.

A couple of years ago, I started making corn pancakes to universal acclaim. Okay, by that I mean Bob and Adrian loved them. We tried different recipes, seeking inspiration from our cookbooks and our own modifications – some were too bread-y, others too bland, others too full of other flavours. We eventually developed our own favourite recipe that has a nice balance of corn and batter, with hints of other flavours in amounts that don’t compete with the corn.

The first time I made these I served them as a side dish, with grilled chicken and a big green salad. I had not known two things: how filling even one corn pancake is; and how unlikely we were to eat just one. Now when we eat corn pancakes, we eat corn pancakes, with perhaps a dab of salsa or some sliced cucumber or tomato.

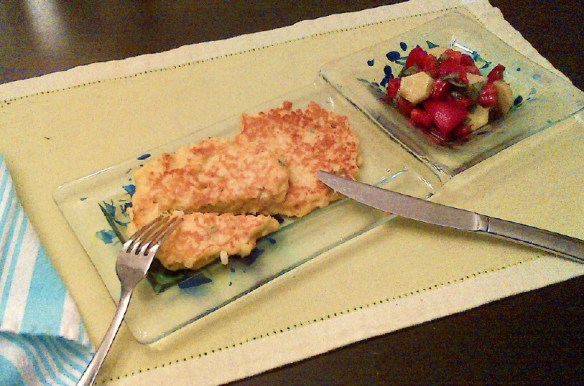
Blog corn fritters with tomato-cucumber salad

Ingredients

(This makes about 10 pancakes – most people will eat 2 or 3 as a main dish, and up to 4 if they get carried away by corn lust.)

About 2-1/2 cups cooked corn, or the yield from 4-5 medium-sized cobs

3 large eggs

1 tablespoon melted butter

¼ cup buttermilk

5 tablespoons flour, any kind (we usually use unbleached all purpose wheat flour, but have used others)

5 tablespoons corn meal or corn flour

2-3 scallions, finely chopped

2 tablespoons chopped cilantro or parsley (optional)

1 teaspoon chili powder or smoked paprika

1 teaspoon sugar (optional)

1 teaspoon baking powder

Salt and pepper

Melted butter to brush on cooked pancakes (optional)

Directions

  1. Cook corn and remove from cob.
  2. Preheat electric or stovetop griddle to medium.
  3. Combine dry ingredients.
  4. Lightly beat eggs, milk and melted butter together.
  5. Mix dry and liquid ingredients together; blend until just combined.
  6. Stir in corn, scallions and cilantro or parsley.
  7. Let batter stand at room temperature for 10-15 minutes.
  8. Put ¼ cup of batter on griddle for each pancake (a soup ladle usually works well), leaving about two inches between mounds of batter.
  9. Flatten batter slightly with a spatula – just enough to achieve even cooking.
  10. Cook for about 4 minutes, then turn with spatula and cook for another 4 minutes.
  11. Cooked pancakes are golden to golden-brown on the outside, and moist on the inside.
  12. Brush a bit of melted butter on the top of each pancake and add a bit more chopped cilantro or parsley.

These are  great on their own, or with a dollop each of salsa and sour cream. In this picture, they’re served with a simple salad of tomato, cucumber, scallion and basil in a balsamic vinaigrette.

You can set aside leftover pancakes  and reheat them briefly under the broiler, turning after a minute or so.

We eat these all year round. They’re fast, easy and inexpensive. And when we pull out a bag of corn we froze last summer, and make these on a cold February evening, it’s late summer all over again – at least for a few minutes at the dinner table.

Sharon lives in Kingston, Ontario – now nearing the end of corn season – where she dabbles in the domestic arts and eats very well.
Welcome to our family’s discussion forum on food. If you’d like to submit a post, please consider yourself family, and email us at familyfoodforum@gmail.com.

After a good dinner, one can forgive anybody, even one’s own relations.”

– Oscar Wilde, A Woman of No Importance

Pumpkin pancakes

Olivia Schneider

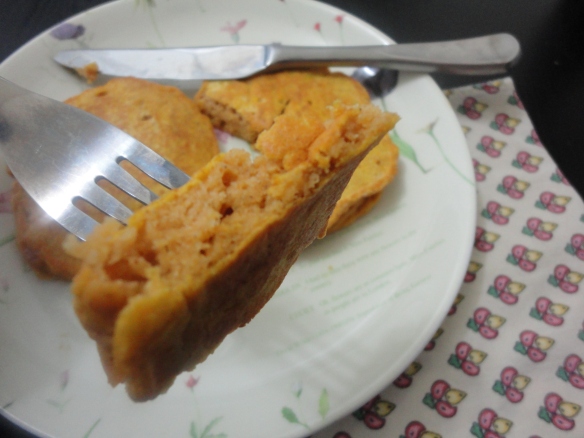
blog pumpkin pancake

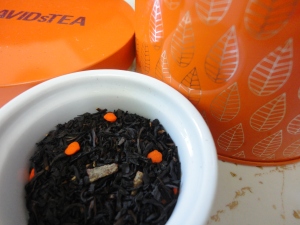
Early in September it felt like the seasons changed in Halifax overnight. For many people this is sad, but I love fall and everything that goes with it—apple picking, the fashions (hello boots and jackets!), cool evenings, colourful leaves, turkey dinners and, of course, pumpkins. It’s obvious that Starbucks controls me too much, but when I see blog pumpkin teatheir Pumpkin Spice Latte on the menu, I know fall has arrived. I told Mom last week that our blog would be nothing without a pumpkin food post. She argued that tomatoes were still in season, and it was too early for fall favourites, but if Starbucks and David’s Tea think it’s time for pumpkin, then I do too!

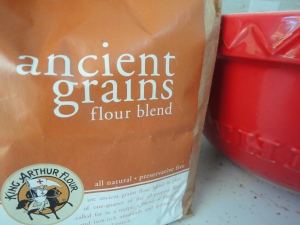
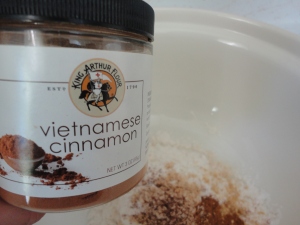
Recently I’ve been playing around with different pancake recipes. My favourite recipe so far has been a vegan and gluten-free banana pancake recipe. I decided pumpkin pancakes would be a simple first pumpkin meal of the season. I used a Martha Stewart recipe and made very few changes. Essentially, all I did was add extra pumpkin and change up the spices a bit. I also used King Arthur Flour’s Ancient Grains flour blend so I could convince myself the pancakes were healthy. The earthy taste actually ended up complementing the spices really well. I had mine with Dablog pumpkin flourvid’s Tea Pumpkin Chai, which is a fantastic black tea they only release in the fall. These were seriously delicious. I could barely resist eating them all while I took pictures. I froze the leftovers for quick toaster snacks. I also froze the rest of the pureed pumpkin in half-cup portions so I have many more pumpkin recipes to look forward to.

Ingredients

1 cup flour

1/4 cup ancient grains flour

2 tablespoons brown sugar

2 teaspoons baking powder

1/2 teaspoon cinnamon (I added a little more)

1/4 teaspoon ground gingerblog pumpkin spices

1/8  teaspoon nutmeg

1/8 teaspoon allspice

1 cup milk

2 tablespoons melted butter

1 egg

6-8 tablespoons pumpkin puree

blog pumpkin wet and dry ingredientsDirections

Mix the dry ingredients together. Mix the wet ingredients together. Fold dry ingredients into wet. Heat a non-stick skillet to medium-low. Add ¼ cup of the pancake mix to the pan. Let each side cook for about 3 minutes.

Olivia lives in Halifax, Nova Scotia, where she enjoys making fast-but-good meals on a budget, and exploring new restaurants and recipes.
Welcome to our family’s discussion forum on food. If you’d like to submit a post, please consider yourself family, and email us at familyfoodforum@gmail.com.

    After a good dinner, one can forgive anybody, even one’s own relations.”

– Oscar Wilde, A Woman of No Importance

Grilled veggies that keep on giving

Sharon Jessup Joyce

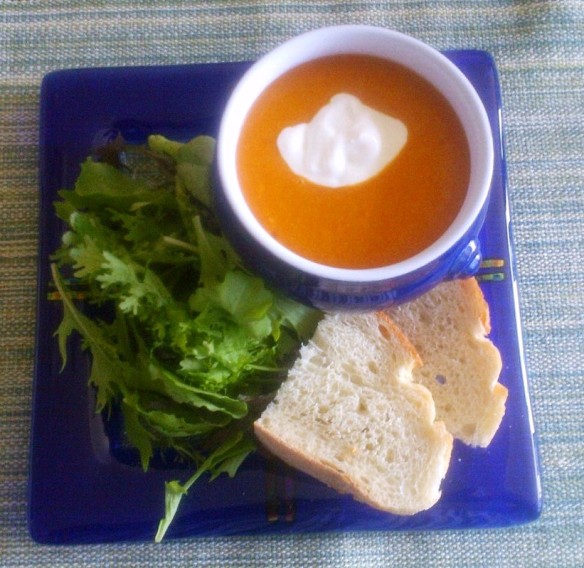
Blog - grilled veggie soup serving

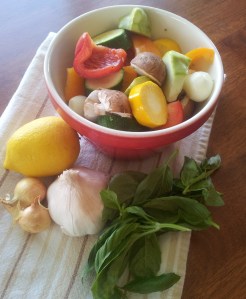
We love grilled vegetables, and eat them often. And despite the fact that Bob has a big and manly and meat-focused grilling cookbook, given to him by an investment fund sales rep, he is a proud and skilled griller of the vegetable.  It’s nice to grill a big batch for several meals. We eat them first right off the grill with fish or chicken. Later we have them cut up in rice pilaf, sliced onto pizza, mixed into bean salad, or pureed into soup. Our basic go-to list of veggies is a bit boring, but always available: different colours of sweet red pepper, onion, zucchini, and sometimes mushrooms and (seasonally) patty pan squash.

One challenge with grilled vegetables is that different veggies do need different cooking times. You can accommodate to this by starting longer-cooking vegetables sooner, or making sure  you select groupings that will be ready at about the same time. And we skip the cherry tomatoes: if you cook them on the grill, they burst and burn and make a mess, unless you give them a very few minutes. I prefer to roast, lightly sauté or just toss in cubed, raw tomatoes – or to put the tomatoes in some other dish.

blog - raw veggies for grillingThe other thing about grilling veggies is that they can be dry and discoloured by the time the flesh is soft enough to be really flavourful. One solution to this is to marinate cut-up vegetables for at least a couple of hours (but less than a day) in a vinaigrette. Depending on the other flavours of the meal, our marinade is usually a mix of equal parts olive oil and either lemon or lime juice or some type of vinegar, salt, pepper, chopped fresh herbs, and sometimes garlic.  We put it all in a Ziploc bag and give it a shake every time we pass the fridge. The acid in the marinade softens the vegetables just enough that they cook faster, and the marinade adds flavour. If you haven’t also put meat into the bag with the veggies, you can use the uncooked marinade afterwards to dress the veggies or a green salad or bowl of rice, since the marinade will have all its own nice flavours, along with a tang of the raw veggie flavours. If it tastes too sharp as a dressing, just add more oil.

It’s a shoulder season for crops, so right now we’ll enjoy as many grilled summer veggies as we can. And when the cooler weather crops start, we’ll enjoy a batch of grilled veggies with mini potatoes, two or three kinds of cubed winter squash, and a couple of different onion varieties. I’ll marinate those in boiled apple cider, apple cider vinegar, hardy herbs from our garden like rosemary, thyme and sage, salt, pepper, and pumpkin seed oil. Bob will cook those for a longer time, over lower heat.

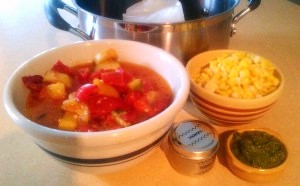
Recently we had someblog-grilled-veggie-soup-ingredients brighter grilled veggies left over, along with tomatoes and cooked corn. Adrian loves turmeric, and I remembered having a soup years ago at a lovely Halifax bistro (now closed, sadly). It was a corn chowder, but the corn was pureed with tomato, turmeric and some other things I have now forgotten. So I put together this soup. Like all good soups, the whole was even better than the sum of its parts. And Jesse, that corn texture you dislike was totally absent – the corn just added a nice sweetness and body. You can see all the ingredients I used in the photo. (What looks like dark-green sludge in this bad photo was actually perfectly fresh chopped herbs, and the sinister-looking yellowish ice block in the pot is previously-frozen chicken stock).

The last point I want to make about grilling vegetables is about the grilling basket or skewers you use. Skewers make for a pretty presentation, but a grilling basket lets you cook more, move the veggies around better, and helps keep the veggie pieces intact. Just make sure you get a basket with smaller mesh. Livy, Ben and I had a frustrating experience a few weeks ago with a grilling basket in Nova Scotia that was apparently designed to grill racks of ribs or something large and solid. We ended up having to line the bottom of the basket with foil, not great, but the best solution that day. The vegetables tasted nice, but there was some strong language (mostly from me, I have to admit) while we rescued bits of zucchini and pepper from the grill surface.

If you don’t have a barbecue, you can broil marinated veggies. Drain off the marinade (so it doesn’t smoke and burn), put the veggies in a foil-lined, sided cooking sheet on a lower-middle rack in your oven, turn them often, and watch them closely.

Sharon lives in Kingston, Ontario – home of a wonderful farmers’ market – where she dabbles in the domestic arts and eats very well.
Welcome to our family’s discussion forum on food. If you’d like to submit a post, please consider yourself family, and email us at familyfoodforum@gmail.com.

After a good dinner, one can forgive anybody, even one’s own relations.”

– Oscar Wilde, A Woman of No Importance

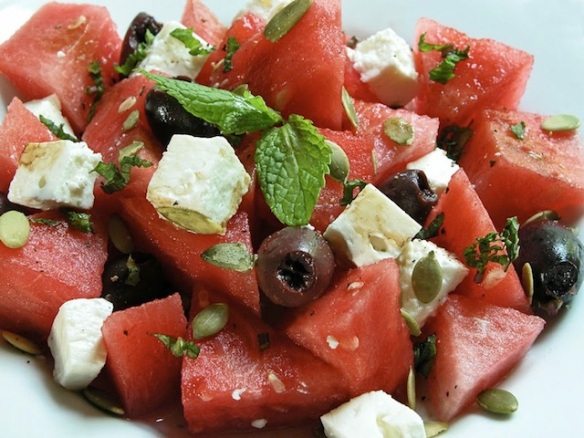
Watermelon and feta salad

Cassandra Joyce

blog - watermelon salad

Over the past few years, my dedication to the sport of running has grown immensely. I may not be the fastest on the road or trails, but the truth is that I love to run. It is my second favourite physical activity.

My first… is eating. And, yes, eating is a physical activity for me (one can get quite winded after consuming eight fajitas in a row). Through my training I have learned the importance of properly fueling my body before, during and after a run to ensure optimal performance and recovery. I know which foods work best for me in this sense and I am also aware of how important it is to rehydrate myself after a long run, especially in the heat we have been experiencing in our nation’s capital this summer!

What better way to do this than by eating bowls upon bowls of juicy watermelon? This delicious fruit is over 90% water and works perfectly fine on its own as a snack after physical activity. However, for those looking for a more unique spin on the fruit to enjoy after pounding the pavement for a few miles, this salad will act as an excellent dish for a summer meal.

When I first made this meal and told my man-friend of the ingredients it was apparent that he was somewhat skeptical. “Cheese and watermelon? Together? But… why?” Therefore I couldn’t help but be proud of myself when he took some leftovers to work to brag to his health-conscious co-workers about “how ridiculously well his beautiful, smart and talented red-headed girlfriend cooks.” I may have paraphrased slightly there, but I’m pretty sure that was the gist of the conversation.

You will need (serves 8):

– one medium or large watermelon (preferably seedless!)

– 4 limes

– 8 oz of your favourite feta cheese

– 1/4 cup extra virgin olive oil

– 1/4 cup balsamic vinegar

– 2/3 cup pitted black olives

– parsley, mint or cilantro to taste (optional)

– one small red onion, chopped (optional) 

Directionsblog - watermelon salad

1) If you have opted to add the red onions, let them steep in two limes worth of juice for about 20-30 minutes

2) Remove the watermelon from its rind and cut into chunks. I usually chop them into roughly 1 inch by 1 inch chunks. You will want to chop or crumble the feta cheese and add it now to the watermelon pieces in a large mixing bowl. If you have opted to use any of the listed herbs, add these now to the mix as well, and stir in so it is integrated as part of the salad, and is not simply a garnish.

3) Add the steeped onions with their juice to the salad. Stir in the olives and add the olive oil and balsamic vinegar. Gently toss the salad with your hands so the watermelon doesn’t lose its shape.

4) Time for a taste test! Add more lime juice if necessary, but otherwise the salad should be ready to eat! If you’re preparing ahead of time, make sure to refrigerate before enjoying.

And one last picture of the furry boys to ensure a Happy Wednesday!

blog - boys

Grilled pizza

By Summer

I made grilled pizza a few years ago in Ottawa with Nicole. I think we were inspired by this Michael Smith recipe.

Since then, I’ve made pizza many times. When I travel home, we have a traditional Cousins Pizza Party. I make the dough. Dad prepares the toppings (he’s a machine). Michael and I build them. Last time Sue took charge of the building and did a fantastic job. Michael made the dough two Decembers ago when I had my arm in a sling. It’s a family affair. Lots of good Pinot Noir. Maybe one or two of Nancy’s famous 19th Hole cocktails…good times.

I also like having pizza parties with my friends here in Bern. I prepare the dough, and everyone has to bring their favourite toppings for one pizza. Canned tuna on pizza is a big thing in Switzerland.

No comment…

This summer, I felt it was time for another go at grilled pizza. I got my friends Raph and Noemi on board to host (they have a barbecue and a large backyard). I had initially planned to follow the technique that Nicole and I used, but Raph bought a pizza stone, and the effect was a thin, crispy crust, deliciously scorched in places. Great success!

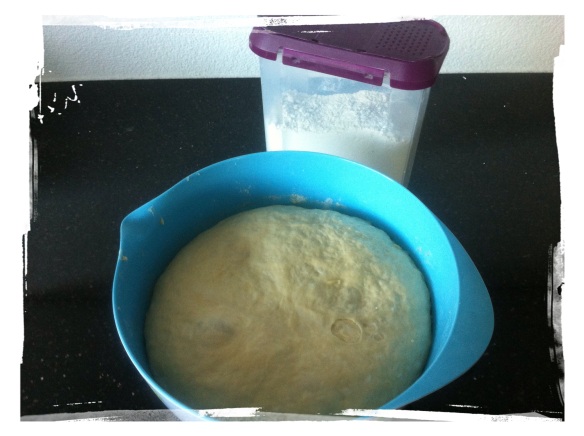
blog pizza dough

 Dough

Use your favourite dough recipe. This is mine. Nicole stumbled across the original recipe on the web while looking for a wheat-free pizza recipe (she’s a good friend):

2 cups white spelt flour

¾ tsp. salt (I guess…I never measure)

1 ½ tsp. quick-rising yeast

1 tsp. baking powder

4 tbsp. olive oil

1 tsp. honey

2/3 c. warm water

Sift the first four ingredients together. In another bowl or large measuring cup, whisk the last three ingredients together. Make a well in the centre of the dough and pour in the liquid. Mix with a wooden spoon to wet all the flour and then get in there with your hands and knead for a few minutes into a smooth dough, adding more flour if necessary, just until you can comfortably knead it without too much stickiness. It should be a nice soft dough. Coat the outside in a bit of olive oil and let rise in a bowl covered with a moist tea towel, for about an hour, or however long it takes to prepare the toppings and have a cocktail or two. You actually don’t need to let it rise if you don’t have time.

The original recipe is here, and it makes one medium-sized pizza. (So I usually have to multiply it by six or eight, which is a great test of my math skills, with varying results.)

 Toppings

The world is your oyster.

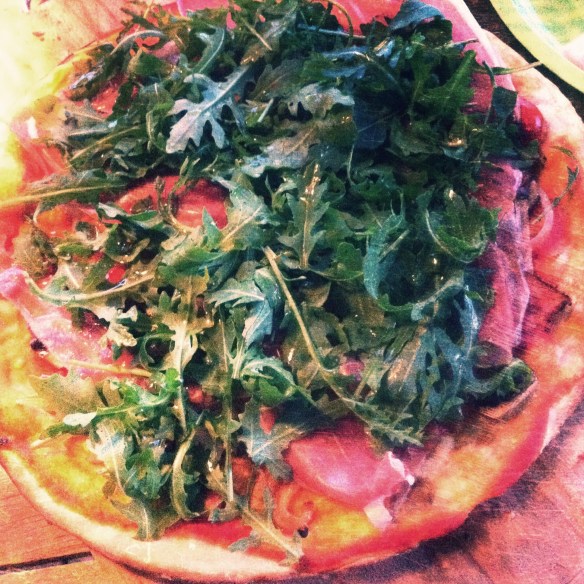
Hands down, I think our family’s favourite pizza is the prosciutto-arugula combo (thanks, Raph!). Slosh on some spicy tomato sauce and a few onions and mushrooms and cook the pizza until it’s almost done. Add the cheese at the end (mozzarella, or even just a sprinkling of parm), and continue to cook for a few minutes to melt. Remove the pizza, top with prosciutto and then arugula, shaved parm if you like. Drizzle of oil. You’re welcome.

A greek-style pizza is an old standby. I also like caramelized fennel, olives and gruyère, as well as a sauceless caramelized onion, brie, thyme and pear combination. Nicole’s simple lemon oil, caper, mozzarella pizza will make your taste buds dance.

blog pizza

 Grilled pizza method

Heat the grill (we used a gas barbecue) with the pizza stone. Raph says the grill was between 200°C and 250°C the whole time. Roll out the dough to fit the stone. Once the stone is nice and hot, transfer the dough to the stone on the grill and quickly build the pizza. The trick is to have all the ingredients prepped and at hand. Close the lid and let cook until the bottom of the pizza is golden and the toppings are sizzling.

Since this method requires less cooking time than with an oven, any raw veggies should be thinly sliced. Raph also bought a giant metal spatula, which made it easier to transfer the cooked pizza off the stone and onto the wooden board we used to serve. And made him look cool.

Repeat.

Summer lives in Switzerland. In her spare time, she is either on her bicycle or in her kitchen.
Welcome to our family’s discussion forum on food. If you’d like to submit a post, please consider yourself family, and email us at familyfoodforum@gmail.com.

After a good dinner, one can forgive anybody, even one’s own relations.”