Flavourful vegetarian soups

Sharon Jessup Joyce

Southwest corn soup

We love homemade soup, but my vegetable soups have traditionally started with homemade chicken stock, either white (boiled on the stovetop) or brown (bones roasted in the oven before water is added). Since Bob and I haven’t been eating meat or poultry lately, I needed a vegetarian soup base, and I’ve been tinkering with several over the past couple of months. In this post, I want to share some of my longstanding soup-making strategies, along with new ones that yield flavourful vegetarian or vegan soups that don’t make us miss our chicken stock one bit.

Commercial broth options: I’ve experimented with different commercial vegetable stocks and broths and found that even the organic and low-sodium varieties tasted kind of fake and salty. Olivia mentioned she prefers vegetable stock in powdered or cube form over the commercial liquids. I tried a Knorr cube in two varieties of corn soup yesterday, tasting before and after I added the cube. I found a single cube in a volume of 4 to 6 servings did deepen the soup’s flavour and tasted a lot better than the commercial liquid vegetable broth. But if time and supply permit, I still want to use homemade broth. Here are some of our favourites:

1. Tomato broth is easy to make from fresh tomatoes being processed for salsa, tomato sauce or roasted tomatoes, either field or roma. As you are processing the tomatoes for other purposes, drain off surplus juice and put one to three cups in each freezer bag. You can also drain the liquid from canned tomatoes and use as broth. Or roast disappointing off-season tomatoes and reserve the liquid as broth.

2. Onion stock can be made from onions sauteed in olive oil until just caramelized. Add salt and a touch of vinegar (balsamic, red wine or apple cider). Add water (1 cup for each onion cooked) and simmer for a few minutes until flavours are combined. Puree and freeze in one-cup portions.

You can make a really nice onion soup with onion stock: 1 part stock to 1 part dry red wine; 2 or 3 varieties of sauteed onion; 2 or 3 types of cheese (we like to include swiss and parmesan, and we never use cheddar) and homemade well-buttered or well-oiled seasoned croutons. You won’t even notice the absence of beef broth.

3. Vegetable stock can be roasted or simmered. Dice one or two carrots, an onion, one garlic clove, a handful of celery leaves and a handful of fresh parsley. (Many recipes call for entire celery stalks, but I find the taste of cooked celery revolting. If you don’t, put celery in.) For every cup of vegetables, use 3 cups water and salt to taste. Simmer on a stovetop until vegetables are completely broken down, which usually takes at least 45 minutes. Strain and freeze broth in one-cup portions. For a richer broth, roast vegetables in an open roaster with a bit of salt and oil until veggies are golden brown and soft. Add water as for unroasted vegetables, cover and cook for another 30 to 40 minutes. Strain broth and freeze.

If I don’t have any homemade broth on hand, or the broth I do have will fight with the soup flavours, I skip the broth and use water. For a creamy soup, I will use milk and cream. If I want to reduce the fat content (and I generally do), low-fat sour cream or low-fat Greek yogurt are good substitutes for cream. If your recipe calls for 1/2 cup cream, substitute 1/4 cup sour cream or yogurt mixed with regular milk. Buttermilk also gives a creamy texture and a nice tang with very little extra fat. I sometimes add a half-cup of buttermilk to carrot-dill soup to enhance the vegetable’s natural creaminess and balance its sweetness.

Using milk or water instead of cream or broth can make the soup taste a little flat, but I have a handful of ingredients I turn to again and again to boost flavour:

1. Medium-dry sherry: I keep a bottle in the fridge and put anywhere from a splash to a couple of glugs in a soup that needs a lift. Most recently, I had a cauliflower-cheddar soup made from cauliflower, milk, grated cheddar, onion, butter, nutmeg, salt and pepper. It was lovely and creamy, but it needed something, and a slosh of sherry did the trick. For this soup, I wanted to taste the sherry against the cauliflower and nutmeg flavours, but sometimes I put in just enough to give the soup a bit of depth, without the sherry announcing its presence. I usually like sherry instead of white or red wine because it is less sharp and acidic in soup.

2. Smoked mild and smoked hot paprika: Use these individually or together in any soup recipe that calls for bacon or salt pork. When you add a pinch more salt and a bit of oil or butter, you won’t miss the pig. Unless you are going for serious heat, a bit of hot smoked paprika is all you need. When I want more spice in a soup, I prefer chipotle chili powder, which has a more subtle flavour.

3. Low-sodium soya sauce: A little bit (I’m talking a teaspoonful or less in 4 to 6 servings) can add depth and complexity. Don’t go overboard, or it will dominate, and your soup will smell and taste like something from a Chinese takeout.

4. Double-strength (dopio) tomato paste: This comes in tubes from Italian grocery stores. A dab or two will add sweetness and a bit of richness to soups, even those without other tomato in the recipe. It will also make soup a more appetizing colour if the combination of ingredients makes the soup look a bit gray or tan-coloured.

5. Boiled apple cider: I used to find this only at King Arthur Flour in Vermont, but I’ve now seen it in fine grocery stores and specialty stores that stock jams, jellies and syrups. You can also make your own: boil plain apple cider down to 20% volume or less and refrigerate the result for a week or freeze for up to a year. A splash or two of boiled cider gives a lovely note to vegetable soups, especially those made with root veggies or squash. One of my favourite fall soups has a water base with lots of parsnips, an onion, a white or yellow potato, one each of two types of apple, a heaping tablespoonful of horseradish, a half-cup of buttermilk (optional) and a generous slug of boiled apple cider. Add a little salt and pepper, puree, and garnish with chopped rosemary for a great cold-weather soup.

6. Maple syrup: A small amount can add a hint of sweetness and smokiness to soups. We use the dark syrup usually used for cooking or to make candies. If you can’t find that variety, use the darkest syrup you can find.

In addition to diced onion, which appears in most of my veggie soups, I like to add another vegetable in a supporting role to boost flavour or texture, especially for pureed soups. For example, a couple of roasted yellow or orange bell peppers are great with the onions and squash in roasted squash and chipotle soup; apples add a grace note to lots of sweet or earthy veggie soups; a potato pureed into broth can thicken cream soups and reduce or eliminate the need for cream; a handful of spinach or arugula with pureed green pea soup makes the colour and flavour of the peas more intense, and so on.  My rule of thumb is that if I like the flavours together on my plate or in a salad, I’m likely to find them pleasing together in a soup.

The soups pictured here are two takes on corn as a star ingredient.

Southwest Corn and Bean Soup (serves 4)

  • 2 cups tomato broth
  • 2-3 cups water + 1 vegetable stock cube
  • 1/4 cup lime juice or apple cider vinegar
  • Salt and sugar to taste (enough to balance the lime or vinegar)
  • 1 onion, diced and sauteed in olive oil
  • 1 red bell pepper, diced and sauteed in olive oil
  • 1 small or 1/2 large jalapeno pepper, finely chopped
  • 1 large or 2 medium fresh field tomatoes, diced (frozen or canned will work)
  • 2 cups corn kernels (fresh or frozen, not canned)
  • 1 19-oz can black beans, drained and rinsed
  • 1 white, yellow or sweet potato, diced
  • Large handful chopped cilantro
  • 1 tablespoon dried Mexican oregano
  • 1-2 teaspoons double tomato paste

Cook diced onion and bell pepper in a small amount of olive oil until soft. Add tomato broth, water, stock cube, and lime juice/vinegar and bring to boil, simmering  until cube has dissolved. Add potato and tomato and simmer, covered, until tomato pieces are falling apart and potato pieces are very tender (about 30 minutes). Add corn, beans, tomato paste, cilantro, salt, pepper, sugar, and (if using) dried Mexican oregano. Simmer 15-20 more minutes and serve.

Vegetarian Corn Chowder (Serves 4)

This soup is traditionally made with bacon and cream. Butter and smoked paprika replace the bacon. We like this just fine with milk instead of milk and cream, but if you want a thicker, silkier texture without cream, puree some of the corn (up to 1 cup) with the milk before you add the milk to the soup. If you want a very thick chowder, use the smaller amount of milk called for in the recipe. We like a thinner texture and use the full amount of milk.

  • 2 small cooking onions, diced and sauteed in butter
  • 2 medium-sized Yukon gold potatoes, diced
  • 3-4 cups fresh or frozen corn kernels
  • 1/2 cup vegetable broth (not tomato-based) or water
  • 2-3 cups milk or combination milk and cream (use preferred fat content, other than skim milk, which is just too thin — we use 1% or 2% milk and 3% sour cream)
  • 1 vegetable stock cube
  • 1-2 teaspoons mild smoked paprika and pinch hot smoked paprika
  • Salt and pepper
  • Fresh dill, thyme, chive or parsley to garnish

Cook diced onion in butter until soft. Add salt and smoked paprika and stir. Add water/broth and potatoes and cover pot. Let simmer gently until potatoes are just tender (about 15 minutes). Make sure pot does not simmer dry. Add corn, milk/cream and stock cube. Cook, covered, for another 30 minutes, stirring occasionally.  Corn chowder
 

Sharon divides her time between Kingston, Ontario and St Margarets Bay, NS, where she loves to cook, eat and swap recipes for soup.
Welcome to our family’s discussion forum on food. If you’d like to submit a post, please consider yourself family, and email us at familyfoodforum@gmail.com.

After a good dinner, one can forgive anybody, even one’s own relations.”

– Oscar Wilde, A Woman of No Importance

Letter from Bern 3: The collection

Susan Jessup

Here is collection of photos and thoughts from Bern. All the photos have a bit of a story relating to food. The menu items that I prepared at the time are italicized, as is the photo description. Just post a request for more details or a recipe.

IMGP6769The bee and the lavender: I was on Summer’s balcony having my breakfast of Swiss organic yogurt and spelt flakes, and was soothed by the steady hum of bees. And just so you know, in Switzerland organics are very close in cost, often the same cost, as non-organics. This country has many good things right about the food.

Portrait of a tomato (in process): A photo of one of the paintings for the show, an Italian tomato with a quirky shape that called to me. We were eating these tomatoes sliced thick, sprinkled with sea salt and sometimes drizzled with olive oil. That’s all.

IMGP6782

The purple flowers that Summer really likes: You can see the little pot of parsley to theIMGP6803 right, and don’t you enjoy the taste and convenience of being able to have your own fresh herbs to season and garnish meals with! I took this shot late in the day at Summer’s insistence, after we lip-smacked our way through a dinner of Chicken braised with white wine, salted capers, olives and lemon peel. The required trough of a fresh local greens salad and some new little roasted potatoes accompanied the chicken. We washed it all down with a fine Colmar wine in the little green-stemmed glasses of Alsace. The sun began its evening dip as Summer exclaimed, “Look at the colour of those little flowers!”

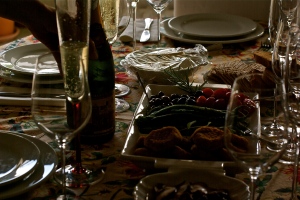
IMGP6818Dinner with colleagues: Summer’s hand can be seen to the left as she pours the Cremant d’Alsace for the appero. This is how the Swiss refer to the starter course (quite sure that it’s misspelled). Right Summer? Three days previously, I had put a generous portion of Turkish yogurt in the little gizmo that Sharon gave Summer for the making of pressed yogurt. On the day, I tipped the pressed yogurt out onto a serving dish, garnishing it with herbs from Summer’s garden and a splash of chili oil. We had that on crackers with olives, pickled capers, tiny tomatoes and radish leaves from the balcony garden. Earlier in the week, I had purchased a hubbard squash from the farmer, roasting it for the Chick peas and squash cakes. Green beans with mustard and fresh sage completed the table with a stack of vibrant green. A salad of escarole, butter lettuce, sweet peppers, fennel and carrot ribbons after the starter, and then the Spelt crust pizza, which was the feature. You must petition Summer for that recipe. The finish was a Double chocolate mousse that kicked my ass in the making of it. But I won the match! The chocolate addicts were, of course, relieved.

The little cat on the roof: This one is for the cat people. She is a polite, shy little thing who spends much of her time outside, often on the roof right outside Summer’s kitchen window. I was preparing our noon meal using fridge treasures. This tree has other treasures that the cat finds particularly fascinating. I imagine she sources many of her meals from it. She graced me with a nice pose that shows off her colours and those of the leaves.IMGP6826


Farmhouse in the distance: I shot this one standing on the bench where I was having a IMGP6836picnic of boiled egg, cheese, rye crackers and tiny heirloom tomatoes. The sun was dipping and the green of the grass and the leaves is real. This green space and farm is just up the road from Summer’s place, and they appear to have bees. Quite likely some of those bees visit her garden. I really appreciate how living, working and farming space is woven together in Bern.

IMGP6888Children’s park and public gardens: I was on my way home from the river to put finishing touches on a dinner of Retro meatloaf, green beans and salad. I usually take the route through a nice park with adjoining gardens that glow with the setting sun.The play structures are made of chunky smoothed logs and pieces of wood to let kids to climb and explore in a closer-to-nature way.

Reflection in the creek: A photo taken when I was heading back to Summer’s place,IMGP6913 after one of my walks. This little creek runs parallel to and not far from the Aare River. It’s a favourite place for the local children to fish, walk slack line and just splash around and cool off. I often take the camera on these walks to the river. That day, I also had a little feast of local organic smoked trout, boiled egg, beets and a tiny Bern pilsner. All this enjoyed while cooling off under a generous tree, feet in the water, scribbling notes for my paintings. There were many swimmers and rafters that day, flashing past like fish on this fast-flowing green river.

Summer: We had quite a challenge matching music to photos for the slide show, which would be shown at the vernissage. Here she is, the reluctant subject hard at work as she waits for friends and salvation. They took her with them to a restaurant that serves Spanish cuisine. You will have to ask her for the details.

IMGP7003

IMGP7029#8: The last canvas painted, and perhaps my favourite. I had trouble putting the palette knives down for this one. There is a point, in the early stages, when I’m supposed to walk away and come back to dry paint with new eyes. This image wanted out, and it kept talking to me, until it was.


At the vernissage, we served Swiss mountain cheese, 12-year-old emmental, gruyere, salted nuts, crackers, vegetable chips and Beluga lentil cakes with reduced orange red wine glaze and piped on lebneh. Summer did not want me to cook. I just had to cook one thing, and so I did. Thanks to Gerard and Summer we drank Amarone and a lovely crisp Italian white.

A big thank you to Summer for supporting the artist in residence for the past two months. She graciously tolerated my weirdness, anxieties and just being in her space, all the while making me laugh every day at the ridiculous in life. What could have been a difficult period of time was not at all. It was lovely and creative.

Good-bye Bern.

Postscript: I would like to go back in time, for my next series, and pass along the food with family adventures in Vancouver at the start of this summer. Justin plucked me out of Ottawa, as the weather burned and my work burned out. He flew me to Vancouver, with 3.5 hours notice. Yeeehaw! We had some amazing moments, which will include a Smoked salsa for halibut, harpooned by one of the dinner guests, Sous vide of pork tenderloin and a five course tasting menu for 7, a Secret Supper (shhhhh).


Susan is a culinary arts instructor, Cordon Bleu- trained chef, and back-to-the-dirt food activist in the Ottawa/Outaouais region who just returned home after a short sabbatical in Switzerland.
Welcome to our family’s discussion forum on food. If you’d like to submit a post, please consider yourself family, and email us at familyfoodforum@gmail.com.

    After a good dinner, one can forgive anybody, even one’s own relations.”

– Oscar Wilde, A Woman of No Importance

Letter from Bern 2: Day trip to Colmar

Susan Jessup

Blog LfB2 street

It’s Saturday and Gerard, a colleague of Summer’s, has invited me to join him for a day trip to Colmar, France. An opportunity for me to reacquaint with Alsace, and for Summer to have a quiet day to herself. I’ve been feeling a little off since Friday morning…a migraine is trying to sneak up on me. Summer asks if a day of traveling is a good plan. But I’m not missing out! I pack snacks, sunglasses and high-test Advil. Gerard is waiting in the car, having arrived precisely at the prearranged time of 8:30. Of course he did. I am in Switzerland after all.

Colmar is charming with what you would expect…typical Alsatian character barely
touched by time. I am stunned by the beauty. It’s sensorially familiar as I’m pulled back intoBlog LfB2 stork in nest the memory of another time. The smells, the language, the architecture, the colour palette and the quality of light. I mention this to Gerard a few times! He nods, smiles, providing the commentary on the region with robust enthusiasm. This is one of his favoured places for weekend escapes. Colmar is situated in the heart of the Alsatian vineyards, although many of the residents believe that Colmar is the heart of the vineyards and of Alsace itself. The slipping away of the knowledge of the old ways, and the rich yet unwritten language, is grievous to even the younger generations. Evidence of this is passionately expressed by an Alsatian version of Kevin Kline (sharp wit and all), who is managing one of the wine distribution shops. He is attempting a quiet early lunch, but allows us to enter for conversation. We are keeping it brief and promise to return after ourBlog LfB2 stained-glass window lunch and a market visit.

This town hosts an international gastronomic event known as Festiga, drawing serious  talent and unique food products from everywhere in the world. The town also boasts significant military achievement in the defense of this rich and productive land. And like many places of natural beauty in the world, it boasts several famous artists. The most notable during our time is Auguste Bartholdi, known for the Statue of Liberty. As we’re winding our way through cobbled streets and into a cathedral, I realize the migraine is upgrading to a psychedelic beast. I’m suggesting strong coffee upon leaving the cathedral. I am keeping the nausea, Blog LfB2 migraine viewdizziness, vision apparently through streams of water and thought-scrambling pretty much to myself (I think). But the pain and Gerard’s fractured face are disconcerting and aggravating. I choose a quiet dark  corner in the little café, and with the sunglasses on, gulp water, coffee, too much Advil and nibble on my take-with food. Gerard is quietly continuing with the history of Colmar, while I’m coming back to myself at the café and during a slow walk to the market. I’m giddy with delight, or Advil, while purchasing fresh cheese, duck paté and just-picked apples. The dried-sausage stall is next, where the vendor tells us we can get one more at no added cost if we purchase four. No problem! A hasty conference of choosing and we have hazelnut, blueberry, two kinds of cheese sausage and a plain one (but not really), which is the runner-up for the sold-out venison. And for Gerard…the pastries that he holds dear. The pastries that will smooth rough-edged workweeks.

We put the food in the cooler and decide to have a traditional lunch of tarte flambée (an Alsatian-style pizza that is finished with crème fraiche). And throwing caution away, I sip a  small glass of Riesling. Wines are often served in the Alsace region in a green-stemmed small bowl glass, which is a perfect little glass for an aperitif or white wine (rosé too). Everyday glasses that Summer should have in her collection.

Blog LfB2 bike and flower viewWe leave the café looking for the signature glasses that a few of the little shops sell for a modest price. We purchase six each and head over to the wine distributor. The timing is perfect! There are several other English-speaking people in the shop and they all want wine knowledge of the region. And so our Kevin Kline lookalike puts on the sommelier hat and begins a spur-of-the-moment wine facts and wine-tasting class. And I won’t miss a word of it. His English is as fluent as his French and Alsatian German. Europeans amaze me, with the number of languages they can typically use to express themselves. This group consists of two Danes, three Americans and two Canadians. The shop glows with lovely wine, good conversation and bursts of laughter. A surprise party! All while the back history of the region’s wines and vineyards was being delivered by our multilinguist with such heartfelt pride and care.

The day’s adventures finish with a trip across to the Autobahn side for a brief period at a leisurely 228 km per hour. Gerard’s testing his car, some video thing that he’s installed on the dash, and quite possibly my nerve. I participated in the wine tasting. Gerard did Blog LfB2 Colmar winenot. I’m grateful on both counts. And the heavy traffic begins…….. before the wine glow ends.  Perfect.

I have included a few photos of Colmar (including a psychedelic vision to match my  migraine view) and one photo of the Gewurtztraminer we had later that week. We drank this wine with a salad of butter lettuce and melon, along with fresh cheese, dried sausage and paté. A perfect little feast of lightly sweet, salt and tang. The Riesling is in the cellar maturing for a further 6 to 12 months, and I’m sure we’ll get to the Muscat and the Cremant d’Alsace soon. I’ll send along menu ideas and techniques after we do.

Blog LfB2 market and cafe


Susan is a culinary arts instructor, Cordon Bleu- trained chef, and back-to-the-dirt food activist in the Ottawa/Outaouais region, currently on a short sabbatical in Switzerland, where she is following another of her passions, painting.
Welcome to our family’s discussion forum on food. If you’d like to submit a post, please consider yourself family, and email us at familyfoodforum@gmail.com.

    After a good dinner, one can forgive anybody, even one’s own relations.”

– Oscar Wilde, A Woman of No Importance

Letter from Bern 1: The market

Susan Jessup

Blog LfB1 beans

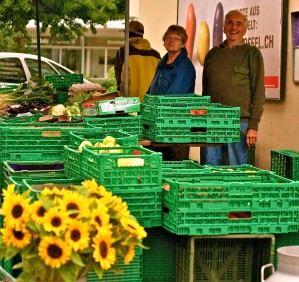
It’s 11:30 on Tuesday morning. I am meeting Summer at the neighbourhood Migros (grocery store) across from the farmers’ market for 11:45, and I am supposed to have the marketing done. The market closes at noon and, in Switzerland, that means 12:00 Blog LfB1 Market viewsharp. I’m late leaving because I’m drinking enough coffee to neutralize the jet lag, maybe, and I’m fidgeting about with her balcony garden. Her garden is in pots, providing flowers, a variety of fresh herbs, chives, green garlic and, very soon, tiny heirloom tomatoes. It’s the little garden that I call The Bees’ Garden, which supports the critically-important bees. It’s also on the right side in the David and Goliath battle of tiny harmless wasps versus the ash borer beetle.

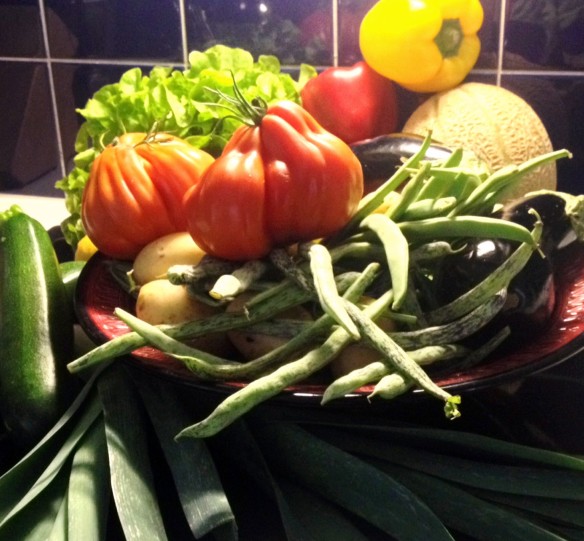
Blog LfB1 celerySummer and I do the marketing together, filling her shopping bags with helda beans (aka flat beans), broad beans, summer squash, eggplant, meaty heirloom tomatoes, sweet peppers, new potatoes, a melon, leeks, greens, and free-range eggs. I’m feeling the unique kind of joy that comes with holding a wealth of farm-fresh produce. I can hear the creative gears in my head picking up the pace as Blog LfB1 fruitwe hit the Migros for a few routine grocery items. We grab and go. She’s heading back to the office and I’m back to the lab for the relentless culinary experimenting.

Summer is craving ratatouille, and so the eggplant, squash, peppers, onion and garlic will be cleaned, cut and roasted with some cold-pressed olive oil and sea salt. The beans are calling to me, and those will be sautéed in olive oil with thyme, oregano, and lemon peel julienne, and then finished with a splash of Martini Bianco. Below are the methods for preparing the ratatouille (referred to with affection as “the rat” by the Chez Eric crew) and the green beans.

The Rat

Ingredients

  • Equal parts eggplant, summer squash (there are several varieties) and sweet peppers
  • Onion and garlic according to preference
  • 2 to 6 large meaty tomatoes such as field, beefsteak, coeur de boeuf (according to the amount of other vegetable)
  • Fresh thyme, oregano or marjoram (or all)
  • Basil leaves or smoked paprika for the finish (optional)
  • Enough olive oil to anoint the vegetables before cooking, reserving a few drops or so at the end to finish
  • Half a glass or so of red wine (or a little splash of red wine vinegar)
  • Sea salt and freshly-ground pepper

Method

  1. Set your oven to 375 F.
  2. Roast pieces of eggplant and squash together until tender and caramelized (separate the two on the cooking tray, because your eggplant may need to be taken out before the squash).
  3. Roast a whole head of garlic and coarsely chop onions. The onions, peppers and garlic typically take about the same amount of time.
  4. While the vegetables are roasting, sauté the tomato pieces in olive oil until tender.
  5. Add the fresh herbs, roasted garlic, wine or vinegar to sautéed tomatoes.
  6. Season with salt, pepper and the optional smoked paprika.
  7. Remove from the heat and pour into a large mixing bowl.
  8. Toss in the roasted vegetables and finish with a little olive oil.
  9. Adjust the seasoning, add the basil leaves and serve.

blog LfB1 market to home

The Beans

Ingredients*

*Use beans you like that are available.

  1. I used 1.5 litres of helda beans and 3/4 of a litre of broad beans
  2. Leeks (according to preference)
  3. Lemon peel (use the peel from 1 lemon per 1.5 litres of beans
  4. Fresh thyme and sage
  5. Olive oil
  6. A splash of Martini Bianco
  7. Sea salt and pepper

Method

  1. Starting at medium heat, sauté the beans in olive oil, with a sprinkle of salt, using a large sauté pan or braising pot (start with the tougher bean if you use more than one variety).
  2. Add the lemon peel, herbs and Martini Bianco.
  3. Reduce heat to low and cover; this allows the beans to steam until they have almost reached the desired tenderness.
  4. Add the julienne of leeks and leave the pan uncovered.
  5. Turn heat to medium-high and cook for 1 to 2 more minutes.
  6. Serve.

Blog LfB1 lettuce

Cook’s note

I also roasted new potatoes and cooked du puy lentils with leeks, thyme and a little beer that we didn’t find so appealing in the glass. The beer was greatly improved with the addition of the other ingredients.

And after all that….A farm- and garden-to-table feast at dinner, with options for the rest of the week.


Susan is a culinary arts instructor, Cordon Bleu- trained chef, and back-to-the-dirt food activist in the Ottawa/Outaouais region, currently on a short sabbatical in Switzerland, where she is following another of her passions, painting.
Welcome to our family’s discussion forum on food. If you’d like to submit a post, please consider yourself family, and email us at familyfoodforum@gmail.com.

    After a good dinner, one can forgive anybody, even one’s own relations.”

– Oscar Wilde, A Woman of No Importance

The Ultimate Burger: what’s yours?

Sharon Jessup Joyce

Blog homemade burger

No, I haven’t fallen into the sin of arrogance. This post’s title refers to the search for the ultimate burger, not a claim that I’ve created it. For someone who doesn’t eat a lot of meat, I’ve enjoyed plenty of burgers, mostly beef, but sometimes vegetarian, chicken or fish (Halifax’s 2 Doors Down should take a bow for the best haddock burger ever, by the way). So I decided I wanted to create a beef burger in the spirit of the gourmet burger many restaurants brag about, with house-ground meat and house-made bun and sauces. I often make homemade hamburger buns and always make homemade ketchup and BBQ sauces, so we knew the potential there. The question was whether grinding the beef at home would help take our burger to the next level.

The obvious first step was choosing the right cut. I know fatty cuts are more flavourful, but they upset my finicky digestion; Bob and Adrian have also become accustomed to leaner cuts. I arrived at our butcher shop assuming I’d pick up sirloin. But Trevor spontanously offered me a great deal on a small and awkwardly-shaped ribless prime rib beef roast. The meat looked beautiful and the price was too good to pass up. So that was the beef taken care of. I figured I could always compensate for the higher-fat cut by making smaller patties.

Blog homemade saucesAt the market, I bought three varities of new onions, which I planned to caramelize with maple sugar. We already had some Cabot cheddar on hand, as well as homemade chipotle tomato ketchup from last fall’s preserving. (I’ll post that recipe in a few weeks, if anyone is interested.)

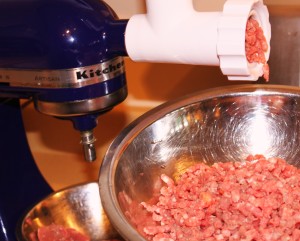
I decided to trim most of the fat from the beef and then add back some fat with olive oil. I know that sounds weird, but the Blog ground prime ribresults were delicious. After ruthless trimming, we had just under one kilogram of meat (see photo). I added 1-1/2 tablespoons olive oil, 2 teaspoons sea salt and 1 teaspoon fresh ground pepper. We ended up with seven 140-gram (five-ounce) patties.

I sauteed the onions in some olive oil, salt, maple sugar and a bit of leftover red wine.

A favourite homemade hamburger bun at our house is honey-oat, but I wanted to limit the number of flavours, so I decided to make maple-oat hamburger buns to reinforce the maple flavour in the onions.

We kept the finished burgers simple, with a mix of extra old and chipotle Cabot cheddar melted on the bun, and caramelized maple onions and homemade chipotle ketchup on the meat patty.

Grinding the meat ourselves just before cooking really did make a difference. I won’t claim this was The Ultimate Burger, but it may have been the best-tasting burger I’ve ever made. Now we just need to find the perfect craft beer to go with it.

Maple-oat hamburger buns

IngredientsBlog maple oat hamburger buns

  • 1-1/2 cups ground oatmeal
  • 2-1/2 cups flour of your choice (I usually use a roughly equal proportion of King Arthur bread flour, Five Roses unbleached all-purpose flour, and Five Roses whole wheat flour)
  • 1 egg
  • 1/3 cup buttermilk
  • 2/3 cup warm water
  • 2 tablespoons oil or melted butter
  • 1/4 cup honey or maple syrup
  • 2 teaspoons sea salt
  • 2-1/4 teaspoons yeast

This recipe is for a bread machine, but you can make it by hand. Here’s a great blog that gives easy steps for converting bread machine recipes to by-hand or mixer versions:

http://dontwastethecrumbs.com/2012/10/simple-conversion-how-to-make-bread-machine-recipes-by-hand/

Directions

  1. Grind oat flakes in a coffee grinder until they have the consistency of a fine flour.
  2. Mix oat flour and other flour(s) and salt together.
  3. Beat egg into buttermilk and add warm water and maple syrup or honey.
  4. Put wet ingredients into bread machine case.
  5. Sprinkle dry ingredients (except yeast) over liquid ingredients.
  6. Spoon yeast on top of dry ingredients.
  7. Use dough setting on bread machine.
  8. Once the dough setting is finished, shape the buns. Use about 70 grams of dough per bun. Roll dough into a round ball, then flatten it very ruthlessly (see photo, above).
  9. Leave, lightly covered, in a warm place until buns almost double in size.
  10. Cook in a 375 F oven for about 15 minutes.


Sharon divides her time between Kingston, Ontario and St Margaret Bay, NS, and has enjoyed some splendid burgers in both spots.
Welcome to our family’s discussion forum on food. If you’d like to submit a post, please consider yourself family, and email us at familyfoodforum@gmail.com.

After a good dinner, one can forgive anybody, even one’s own relations.”

– Oscar Wilde, A Woman of No Importance

Summer Sunday luncheon

Sharon Jessup Joyce

Summer Sunday salad lunch

Recently we took a day trip to Ottawa. Bob and Shelly and I went to have lunch with Dad and Cassandra (Dave was at the Calgary Stampede and Brody and Adrian each had plans with friends). I wanted a special meal, but it needed to be portable. And it was a hot weekend, so I wanted it to be served cold. We ended up with cold poached salmon with avocado mayonnaise, a Nicoise-style potato and bean salad, baby greens with strawberries and strawberry-balsamic vinaigrette and a corn salad and bread from Pan Chancho. For dessert, we had strawberry-rhubarb vanilla cake with fresh strawberries and whipped cream. Some of Dad’s own white wine complemented the meal wonderfully.

IMG_1642Nicoise-style potato salad (portions given are for 1 pound of potatoes)

Cook new potatoes whole and unpeeled in salted water. When they are done, peel skin (optional), drain and toss with red wine vinegar (about 1 tablespoon vinegar to 1 pound of potatoes) and salt to taste. Set aside to cool.

Cook green beans (or green and yellow beans) until just tender, then drain and soak for 10 minutes in an ice-water bath. Drain and dry thoroughly.

Shred about 1/4 cup basil. Dice 2-3 green onions. Set aside.

Crush 2 garlic cloves and mix with 2 tablespoons red wine vinegar, 1 tablespoon lemon juice, 2 teaspoons dijon mustard, 4 tablespoons olive oil, pinch of sugar and black pepper to taste. Add basil and green onions to dressing and dress potatoes and beans with dressing. Reserve about 1 tablespoonful of dressing.

Slice cherry tomatoes in half or large tomatoes into wedges. Put tomato pieces on top of salad and drizzle with remaining dressing. Garnish with black olives.

Full-meal option: Add wedges of hard-boiled egg or tuna, or both.

Poached Mexican-style salmon with avocado mayonnaise (serves 4)

Mix juice of 1 lime, 1 tablespoon olive oil, 1 teaspoon chipotle chili powder and 1 Poached salmonteaspoon sugar. A small amount of salt is optional, but I didn’t use any this time.

Pour seasoning into a large skillet with a cover. Put one single piece of fresh salmon (1 to 1-1/2 pounds) in skillet and cover. Bring liquid just to boil and turn down to simmer. Simmer until salmon is opaque and flakes easily. Depending on its thickness and how you like your fish, this may be about 7 to 15 minutes. The nice thing about this cooking method is that the salmon won’t dry out, but you obviously don’t want it to become mushy. When the fish is cooked, set it off the heat, uncovered, to cool. Pour the poaching liquid over the fish while it cools.

Slice limes and cucumber very thin and place in a ring around a plate. Once the salmon has cooled, transfer it carefully and place it in the middle of the ring (a large spatula in each hand, a slow, careful approach, and a certain amount of cursing seems to do the trick).  Garnish with cilantro and chill until serving.

Cassie and hydrangeas Sunday lunch

Avocado mayonnaise

Puree two ripe avocadoes, 1-2 tablespoons buttermilk, juice of 1/2 to 1 lime, 1 jalapeno pepper, 2-3 green onions and about 1/2 cup cilantro, with salt to taste. Add a pinch of sugar if sauce is too tangy for your taste. Blend until very smooth. If you want a thicker sauce, substitute any mayonnaise dressing you like (full-fat, half-fat, no fat, Miracle Whip, etc.) for the buttermilk.

A note about limes (and Atlantic salmon)

Why have limes become so expensive? Mexican and Central American drug cartels have moved in to try to control lime production, since the North American appetite for limes has made the fruit a tremendously valuable commodity. In many areas, the criminals are succeeding, with really horrifying results, including the illegal seizure of farms and crops, and even the deaths of farmers and other citizens in lime-producing regions. It’s a complex situation, with one approach being to stop consuming limes. Much as I love that little green citrus fruit, I did consider making this choice, using lemons as a (poor) substitute for many dishes I cook and my family enjoys. But as I researched the issue, I found that lime farmers are organizing to fight back, with the support of governments and citizen justice organizations. These groups have asked North American consumers to keep eating limes, but source them carefully, from reputable growers and distributors. With the complexity of the food production and distribution chain, I’m not confident that limes I buy in Kingston, Ontario have a legitimate pedigree, the way I could know, for example, if I lived in southern California. It’s interesting that in Nova Scotia, our limes often come from Israel and other Mediterranean locales. In the meantime, I will pledge to keep eating local and seasonal fruits as much as I can — hence the focus on strawberries at our table in June and July.

And yes, farmed Atlantic salmon has also become an increasingly problematic food. I find hope in a recent conversation I had with a fishmonger in Halifax, who was telling me about new approaches to fish farms that will help to reduce overcrowding, disease and escapes into wild stocks so prevalent with current farms. The problem? Cost, of course. As consumers, we will literally need to put our money where our mouth is. And we need to care enough to do our homework to make sure we are eating fish raised ethically for all parties (including the salmon). As a part-time resident of Nova Scotia, the pat answer that I should eat more wild Pacific salmon isn’t a long-term solution for the Maritime provinces’ economy, Atlantic Canadians’ goal to eat locally or for the Pacific fishery, for that matter. And Atlantic salmon is a different species with a very different taste from its Pacific counterparts.


Sharon divides her time between Kingston, Ontario and St Margarets Bay, Nova Scotia, and tries to shop, cook and eat locally — and ethically — wherever she is, but it’s not easy sometimes!
Welcome to our family’s discussion forum on food. If you’d like to submit a post, please consider yourself family, and email us at familyfoodforum@gmail.com.

After a good dinner, one can forgive anybody, even one’s own relations.”

– Oscar Wilde, A Woman of No Importance

Easy fried rice

Adrian Schneider

Vegetable and egg fried rice

On Monday, I had a hankering for some eggs. Normally that’s a pretty easy thing to take care of: omelettes, fried eggs, poached eggs… all have a happy place in my limited store of memorized recipes. But I was in the mood for something different. Grasping at everything I could think of to do with eggs, a vision of scrambled eggs popped into my head. Problem was, we had run out of milk, and I wanted something stronger and eggier anyway. Scrambled eggs, just the eggs, the same kind we slice up into strips and put on fried rice….

Aha.

Fried rice

The following is what I used, but there’s no particular reason to restrict yourself to these quantities or ingredients. It turned out to be a pair of lunches’ worth.

Ingredients

  • 1/2 cup white basmati rice
  • 2 teaspoons low-taste cooking oil (sunflower in this case)
  • 1 cup broth (2 pouches of chicken oxo in water, here, but vegetable stock would work nicely; a teaspoon of soya sauce would have been a good addition)
  • 1/3 cup cooking onions (I used 2 miniature onions from the market)
  • 1/4 of a large sweet red bell chili (ed note: called a bell pepper by many of us)
  • the rest of a bag of frozen peas, like 1/3 cup or so
  • 2 large eggs

Directions

A bowl of fried rice isn’t especially difficult to put together. The only real trick to it, rather appropriately, is frying the rice. If you fry the rice after it’s cooked, you get blobs of rice grains that are hard and crunchy on the outside, never a texture I’ve enjoyed. So you do it before. Put the oil in a pan on medium and wait for it to get hot, then put in your uncooked rice. You want to fry the grains until they’re a nice uniform golden colour. They’ll need to be stirred constantly, especially toward the end. You’ll see the grains puff up a bit, but don’t worry, they’ll be nice and golden before they turn into Rice Krispies.

Put the rice aside in a bowl while you start the broth boiling; it needs to cool a bit. Once the rice is fried you just handle it like regular rice: put it in the boiling water, cover, turn down to a low simmer, and steam for ~15 minutes. This is a good time to start your vegetables sauteeing if you like them soft like I do. Frozen peas don’t need the cooking and can just be thrown into the rice once it’s finished steaming, but the onions and sweet chili (ed: bell pepper) want to be diced up and simmered. Once the rice is steamed and in its final absorb-the-water stage, transfer all your vegetables to the rice pot and put the lid back on.

It’s finally egg time. Despite being kinda scrambled egg-like, the cooking is more like making an omelette. Whisk up the eggs and put them into a pan preheated to medium heat. You want them to cook into a flat sheet, so make sure the pan is large enough for them to spread out. If you’re anything like me, you’ll start worrying that they’re cooking too slowly and want to turn up the heat, but keep it even; you want the middle cooked enough that you can flip the egg-disk over, but without the bottom getting scorched. Once the eggs are solid enough that you can flip them, do so (or stick them under a broiler if you prefer). They’ll cook very rapidly from here, probably only a minute or two. Slide them onto a board and slice them into short strips with a sharp knife.

Serve out the rice, and decorate liberally with the strips of egg. Then eat.


Adrian cooks recreationally and eats seriously in Kingston, Ontario. 
Welcome to our family’s discussion forum on food. If you’d like to submit a post, please consider yourself family, and email us at familyfoodforum@gmail.com.

After a good dinner, one can forgive anybody, even one’s own relations.”

– Oscar Wilde, A Woman of No Importance

Canada Day with a Mexican twist

Chicken avocado saladSharon Jessup Joyce

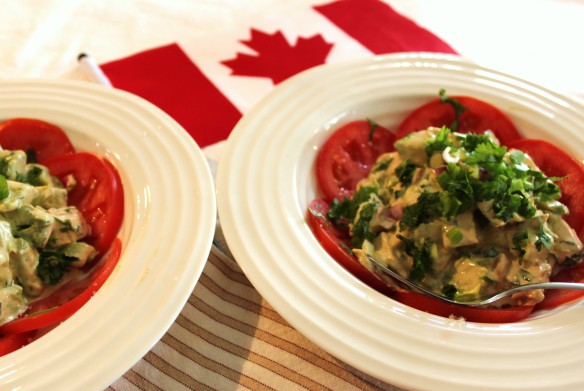
We’ve been into salad suppers lately. It’s partly because there’s so much fresh produce around, but also because we’ll do anything to avoid turning on the oven in this heat. Many of our nightly salads have been greens-based and vegetarian, but I wanted to make something a little heartier for Bob’s and my Canada Day lunch. So here’s what we had — not very Canadian, I guess, but delicious.

Ingredients for chicken-avocado salad with sliced tomatoes (serves 4)

Chicken

  • 4 boneless, skinless chicken breast halves
  • 1 tablespoon olive oil
  • 1 teaspoon chipotle chili powder
  • 1/2 teaspoon salt
  • Juice of 1 lime

Dressing

  • 2 ripe (but not mushy) avocadoes, cubed
  • 4 scallions, sliced
  • 1/2 cup chopped cilantro
  • 1/2 to 1 jalapeno pepper, finely chopped
  • 1 tablespoon olive oil
  • Juice of 1 small lime (about 2 tablespoons)
  • 1/4 cup regular or low-fat sour cream
  • 2 tablespoons regular or reduced-fat mayonnaise
  • 2 tablespoons regular or low-fat buttermilk
  • 1 teaspoon sugar or honey

Topping

  • 1 scallion, diced
  • 2 tablespoons chopped cilantro
  • 1/4 cup diced sweet red pepper (optional)

Directions

  1. Preheat skillet with 1 tablespoon olive oil.
  2. Sprinkle chicken breasts with salt and chipotle chili powder and brown on both sides.
  3. Pour juice of 1 lime over chicken, cover skillet and simmer until chicken is fully cooked.
  4. Set aside chicken to cool. Reserve pan juices, which should be thick and reddish-brown.
  5. Mix remaining olive oil, lime juice, sugar or honey, salt, sour cream, mayonnaise and buttermilk. Add reserved pan juices and mix.
  6. Dice chicken, avocado, scallion and jalapeno pepper and toss gently in dressing.
  7. Mound salad in centre of rimmed soup bowl or luncheon plate and surround with tomato slices.
  8. Sprinkle additional chopped cilantro and scallion (and red pepper, if using) on salad.

Strawberry sangria

Cousin Natalie gave me a shout-out on Facebook for my traditional sangria recipe, so of course I instantly wanted some. Here is a version of sangria we had yesterday to take advantage of what we had in the house. I never drink Fresita without remembering good times with Summer and Alysha, and yesterday was no exception.

Strawberry sangria

Ingredients

  • 2 cups dry rose
  • 2 ounces amber or white rum
  • Juice of 1 lime
  • 1 cup strawberries, sliced
  • 2 cups Fresita strawberry sparkling wine (available at the LCBO and many other wine stores)
  • 2 cups sparkling water
  • Lime slices
  • Sprig of mint  for each glass

Slice the strawberries and pour the rum and lime juice over them to sit for at least an hour. Add rose and lime slices. Let sit in fridge. To make a glass of strawberry sangria, put ice cubes in a large wine glass. Pour two parts wine-fruit-rum mixture and top with one part each of chilled Fresita and chilled sparkling water.

Lime mousse with strawberries and vanilla whipped cream

For last night’s dessert, we broke with our tradition of having strawberry shortcake on Canada Day. I just couldn’t face turning on the oven to make the biscuits. So instead I made a lime mousse to serve with the strawberries and whipped cream. It was very tasty, but Adrian and I thought the mousse needed to be a bit lighter, so below is the adjusted recipe. It is NOT low-fat, but it sure was tasty!

Lime curd, strawberries and cream

Ingredients

  • 1 tablespoon butterLime curd
  • 2 whole eggs
  • 2 egg yolks
  • 1 teaspoon lime zest (or lemon zest)
  • 1/2 cup sugar
  • 1/4 cup fresh lime juice (or lemon juice)
  • 1 cup heavy cream, whipped

DirectionsLime curd with whipped cream

  1. Bring water to a boil in the bottom of a double boiler, then turn heat down so water maintains a vigorous simmer while you cook the lime curd.
  2. Melt butter in top of double boiler.
  3. Mix together eggs, egg yolks, lime zest and juice, sugar and salt in bowl, beating until smooth. Pour into double boiler top.
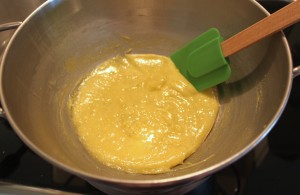
  4. Stir mixture constantly with whisk until it thickens to the consistency of custard (about 10 minutes).
  5. Place double boiler top in a bowl of ice water (make sure it is not full enough to allow water to leak into custard.
  6. Cover custard with plastic wrap — make sure the wrap is against the surface of the custard to prevent a skin from forming.
  7. Refrigerate custard until cool, usually about an hour.
  8. Whip cream until it is very stiff.
  9. Gently fold cream into custard until just blended.
  10. Spoon mousse into individual serving bowls.
  11. Surround with unsugared berries and top with vanilla whipped cream.
Sharon lives in Kingston, Ontario, where she is counting the days until her return to Nova Scotia (10.25 days, give or take a half-hour).
Welcome to our family’s discussion forum on food. If you’d like to submit a post, please consider yourself family, and email us at familyfoodforum@gmail.com.

After a good dinner, one can forgive anybody, even one’s own relations.”

– Oscar Wilde, A Woman of No Importance

Strawberry shortcake, deconstructed

Blog strawberry shortcake photoSharon Jessup Joyce

It’s strawberry season, so we’re eating as many of those juicy heart-shaped berries as we can right now. We’re roasting strawberries to add to muffins and ice cream, stirring them into yogurt, slicing them into green salads, pureeing the soft ones for smoothies and daiquiris, and enjoying them whole on fruit plates. And of course we’re eating them in that iconic dessert, strawberry shortcake.

Today I wanted to take a treat to our kind friends at Princess Animal Hospital. Mina, Seth and Spenser have been their patients for over a decade, and we’ve often wished the health care our human family members got was as loving, skilled and timely as that given to our four-legged family members. Since it’s the last week in June, I really wanted to bring them strawberry shortcake, using the juicy berries I had on hand. But while it’s usually a crowd-pleaser, this dish didn’t seem to be a treat that would be easy to enjoy during a workday in a veterinary hospital. So I decided to deconstruct strawberry shortcake, and let our friends assemble their own dessert. Another advantage to the deconstructed presentation is that people can choose to eat one, two or all three components of the dish.

Usually I make strawberry shortcake with only slightly-sweeted biscuits, unsweetened cream, and sliced or halved sugared berries. But the berries are so perfect right now that I wanted to keep them whole or halved. I also thought that would work better for anyone who wanted to eat only berries or needed to enjoy their treat later on. So I increased the sugar in the biscuits, and added a bit of sugar and a generous dollop of vanilla paste to the cream, leaving the berries just as nature made them.

Biscuits

This recipe is adapted from the Five Roses Cookbook — as I’ve mentioned before, it was my grandmother’s favourite cookbook, and is great for classic baked goods. The original recipe calls for shortening and regular milk, but you can’t beat the flavour of biscuits made with butter and buttermilk.  The recipe also calls for all-purpose flour only, but I find a mixture of all-purpose and cake flour gives the biscuits a silky texture. When I am using sugared berries, I reduce the sugar in the recipe to 2 tablespoons.

Blog strawberry shortcake deconstructed

Ingredients

  • 3 cups flour (2 cups all purpose and 1 cup cake flour)
  • 4 teaspoons baking powder
  • 1/4 cup sugar
  • 3/4 teaspoon cinnamon
  • Pinch salt
  • 6 tablespoons cold butter
  • 1-1/5 cups buttermilk

Directions

Delicious biscuits are about great ingredients, careful handling and not overbaking.

  1. Preheat oven to 425 degrees F or 400 degrees F convect.
  2. Line a baking sheet with parchment.
  3. Blend all dry ingredients thoroughly in a large bowl.
  4. Cut butter into 6 pieces and drop into dry ingredients; using a pastry blender, cut butter into dry ingredients until butter pieces are about the size of small peas.
  5. Pour buttermilk all at once over dry ingredients and butter mixture.
  6. Stir gently until milk and dry ingredients are blended. Don’t overmix! Dough will be very moist and shaggy.
  7. Turn dough onto lightly floured board and rub your hands with a bit of flour.
  8. Gently flatten dough with hands to form a rectangle about 1-1/2 inches thick.
  9. Using a sharp knife, slice biscuits into squares OR use a round biscuit cutter.
  10. Place biscuits on baking sheet, approximately 2 inches apart. This recipe makes 12 large or 18-20 small biscuits.
  11. Bake biscuits for 12 minutes (small size) to 16 minutes (larger size). Cooked biscuits should be slightly golden, never brown.
  12. Sprinkle tops of warm biscuits with a little sugar (optional).
  13. Serve warm or at room temperature.

Vanilla whipped cream

For each cup of whipping cream, add 2 teaspoons sugar and 1 teaspoon real vanilla paste or extract. Add sugar and vanilla once cream is almost whipped. If you’re transporting the cream to another location, as I was, make sure the cream is beaten until peaks are quite stiff.

The treat was received with kind enthusiasm by our friends at the best veterinary hospital there is. Even Princess, the hospital’s CEO, seemed intrigued when I set the plates of food down. Here she is, looking at me through a window. Perhaps she’s daydreaming about whipped cream?Princess looking out low window at PAH


Sharon divides her time between Kingston, Ontario and St. Margaret’s Bay, Nova Scotia, and enjoys cooking, eating and sharing food with friends.
Welcome to our family’s discussion forum on food. If you’d like to submit a post, please consider yourself family, and email us at familyfoodforum@gmail.com.

After a good dinner, one can forgive anybody, even one’s own relations.”

– Oscar Wilde, A Woman of No Importance

Proud to be crunchy granola

Granola breakfast 3Sharon Jessup Joyce


When I started making my own granola, about 30 years ago, some people seemed to think I was being excessively DIY, like someone who would insist on weaving and dying the fabric for all her clothing. But I liked the flavour, price and health benefits of the homemade product, and I obviously wasn’t alone: making your own granola has become pretty commonplace.

I’ve developed a formula for granola, which results in a cereal that tastes great with yogurt and takes Bob, Adrian and me through to lunchtime. In a fit of scientific enthusiasm, I once worked out the protein, fat, carbohydrate and sodium per serving for my granola, but that information appears to have disappeared with the death of my previous computer. (Yes, I should do backups more regularly than I do, and yes, there was a lively discussion at our house that day about what constitutes “a serving.” Just so you know, my serving is a quarter-cup of granola with about two-thirds of a cup of yogurt.) I’ll crunch those nutritional numbers again and post them in the comments section. For now, let’s just say this granola is fairly low in both sugar and fat. My version does not have added salt.

One of the best parts about making homemade granola is the fun of combining flavours. Right now we are eating an almond-cherry-vanilla granola that is delicious. In the fall I use dried apples and cranberries, lots of pumpkin seeds and maple sugar. Another tasty combination uses dried peaches, pears and apricots, with powdered and diced candied ginger and slivered almonds. A granola that has dried cherries with pieces of dried peach and sliced hazelnuts is ridiculously good.

Granola proportions

  • 9 cups grain
  • 3 cups seeds or nuts
  • 2 cups dried fruit (or 2-1/2 cups, if I’m being honest)
  • 1 cup freshly-ground flax seed
  • 1/4 to 1/3 cup sugar (brown, maple or white)
  • 1/4 cup nut, seed or vegetable oil
  • 1 tablespoon spices (optional)
  • Pinch of salt (optional)

Granola

Method and ingredient considerations

Grain: I’m boring. I like to use large-flake non-quick-cook oats for my grain. I used to put wheat germ or wheat hearts in my granola. I stopped using it for Summer’s sake, and then we all decided we liked the cereal better without the wheat anyway. I’ve flirted with other grains, but I always come back to oats.Lots of people do cool things with quinoa and the like, and I’ve given it a whirl, but I am now at peace with my oat preference.

Seeds or nuts: Use raw or roasted, and not salted or with added oil. My favourites are almonds, which go with lots of flavours and are widely available sliced and slivered, and pumpkin seeds, which are yummy. We have various nut and seed allergies and aversions at our house, so this turns out to be the trickiest bit for us. But all nuts and seeds work. Don’t use whole nuts, since you’ll lose that nice experience of having some nutty flavour and texture in every bite of your cereal.

Dried fruit: It’s fun to use a combination. If the fruit is bigger than a raisin, cut it into raisin-size bites, on the same principle as using sliced or slivered nuts. The prettiest granola I make has a combination of cranberries and apricot and apple pieces (all dried). The batch pictured here has two kinds of cherries, because when there are cherries in a dish, I get mad if I have to eat any fruit that is not a cherry. You may not suffer from this issue, and can mix cherries and other fruits with abandon.

Flax seed: White, brown or red are all fine (and have been found to be nutritionally equal). Keep the whole seeds in a sealed container in the freezer and grind only as much as you need for a dish. I grind mine in a coffee grinder that never, but never grinds coffee.

Oil and sugar: I mix the ground flax seed with the oil and sugar. I usually use pumpkin, sunflower or almond oil. If I want to use honey or maple syrup instead of sugar, or if I am adding vanilla extract or paste, I still mix it with the flax and oil. Mix it together with a fork or your hands  — I use my hands because I do like to play with my food — until you have grainy-textured nuggets around the size of a pea. Blend this mixture well with the grain and nut/seed ingredients and spices and a bit of salt (if using). You will still  have little lumps of flax/oil/sugar, but try to make sure they are very small lumps. They will be tasty little treats in your finished granola.

Bake: Don’t add your dried fruit yet. Put the rest of the granola on a large baking sheet. For the above quantity, I use a commercial half-sheet, covered in parchment. I bake my granola in a 275-degree F oven for about 40 minutes, stirring it 2 or 3 times. Don’t let your granola get brown. You are lightly toasting everything, that’s all.

Add fruit: Add the fruit when you take the granola out of the oven. Let the granola cool completely before bagging it. I keep granola in the freezer in 2-cup amounts, and keep out just enough at a time to fill the granola jar, pictured here.

Overly-dry dried fruit: If you think the fruit is too dry or has a crystallized texture, pour about 1/4 cup boiling water or apple cider on the fruit, stir it around, let it sit for a few minutes, then drain. Spread fruit out on a plate or board covered in a towel or paper towel to remove extra moisture. If you want a crunchier granola texture, you can add the water you used to soften the dried fruit to the flax/oil/sugar mixture. You may need to bake the granola a few minutes longer if you do this.

We eat our granola with yogurt, either plain or plain that has been jazzed up with some boiled apple cider, vanilla paste, honey or maple syrup (or a combination). There is a bit of tension in our granola world between Adrian, who wants it sweeter, and me, who doesn’t. Bob cheerfully eats whatever granola is in the jar. We have now negotiated a peace treaty whereby our granola is much less sweet than any commercial variety I have tasted, but still offers a little sweetness if you eat it with plain yogurt. If you want it to be sweeter, you can support your local maple syrup or honey producer and pour a dollop of syrup or honey into your yogurt.


Sharon is back in Kingston, Ontario, where she is pining for the Atlantic Ocean, but grateful for her KitchenAid range.
Welcome to our family’s discussion forum on food. If you’d like to submit a post, please consider yourself family, and email us at familyfoodforum@gmail.com.

After a good dinner, one can forgive anybody, even one’s own relations.”

– Oscar Wilde, A Woman of No Importance

Dates and cocoa

By Summer

blog brownie photo summer

Working insane amounts and being on a cleanse (don’t worry, I can still manage to “cleanse” and eat copious amounts of food) isn’t very conducive to food blogging, but I decided to buckle down and write about the two ingredients that currently feature high on my shopping list: cocoa and dates.

The first recipe isn’t mine at all. I’ve taken it directly off the great blog My New Roots. There are only three main ingredients, plus salt, but the whole is definitely more than the sum of its parts in this case. It’s unbelievable how much these dense little squares actually taste like brownies. They in fact don’t taste like dates at all. And they are cleanse-friendly! My boss Mark loves them.

The hot cocoa was invented out of my desire for dessert while on this ^&*^% cleanse. It had to be in liquid form (those are the evening rules) and could not contain any sugar or dairy. One evening I decided to blend up a couple of dates with some cocoa and the non-dairy milk I had in the fridge. The result was surprisingly rich and delicious. Even better than the real thing, dare I say?

Raw brownies

2 cups whole walnuts

2 ½ cups Medjool dates, pitted (use nice plump ones)

1 cup raw cacao (I actually don’t bother with raw)

1 cup raw unsalted almonds, roughly chopped (or just more walnuts or pecans)

¼ tsp. sea salt


Grind up the walnuts in the food processor. Add the cocoa and salt and pulse to combine. While the food processor is running, add the dates one at a time. The end mix should be a moist crumbly mess that will stick together when pressed.

Empty the contents of the food processor into a bowl and fold in the chopped almonds (or other nuts). Press into a pan lined with foil or parchment paper. Cover and refrigerate until firm. Cut into squares and return to the fridge or freeze.


Desperation hot cocoa

  •  2 or 3 small dates
  • 1 tbsp. cocoa
  • pinch of salt
  • 2 cups non-dairy milk (anything unsweetened: almond, rice, oat, millet, hemp)

It’s important that the dates be soaked first. I put a bunch in a bowl (they don’t have to be very soft ones but should be nice quality) and pour boiling water over top to just cover. I then cover them and stick them in the fridge overnight. This softens the dates so that they blend well, and the soaking water turns into a deliciously sweet syrup that you can add to the cocoa or anything else (especially when you’re on this cleanse).

To make the cocoa, put two or three of the soaked dates in the blender along with a splash of the syrup the dates are sitting in. Add a bit of whatever milk you’re using and blend until the dates are pureed. Next, add the cocoa, salt and the rest of the milk and blend until frothy. Pour into a pan and heat.

Apologetic site administrator’s note: If these recipes have an autumnal air, it’s because I forgot to post this contribution from Summer back in October when she sent it. But it’s always the right time for a good brownie, so enjoy!

Summer lives in Switzerland. In her spare time, she is either on her bicycle or in her kitchen.
Welcome to our family’s discussion forum on food. If you’d like to submit a post, please consider yourself family, and email us at familyfoodforum@gmail.com.

After a good dinner, one can forgive anybody, even one’s own relations.”

Flexible fruit muffins

Sharon Jessup Joyce

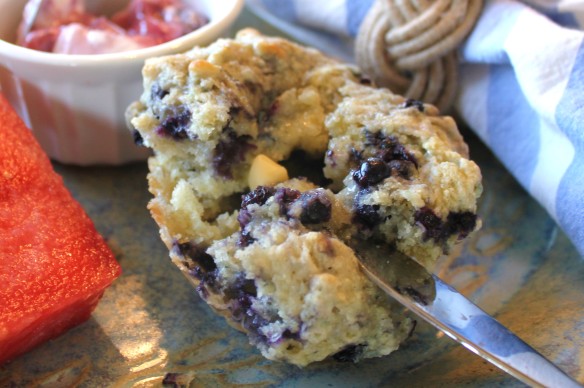
Blog blueberry muffin

My sister Susan is a Cordon Bleu-trained chef. But even before her formal food education, she was creative and gifted in the kitchen, with a passion for sustainable and local eating when it was considered a bit odd, instead of hip or responsible. She has  always loved the challenge of using what you have on hand. Susan’s starting point for a meal is usually “What ingredients do I have?” or “What’s in season?” as opposed to “What ingredients do I need to get?” She has run professional kitchens and raised five children on this philisophy, turning out amazing meals, day after day, year after year.

I thought of this recently when I ran out of flour, sugar and buttermilk at the Nova Scotia house. I wanted to make blueberry muffins, using a memorized recipe from the good old Five Roses Cookbook, a standby in my grandmother’s kitchen, and a favourite of mine for classic baked goods, such as pound cake, biscuits, scones and cake-style muffins. But I didn’t want to drive into town to the grocery store, so I improvised, Susan-style, using maple sugar instead of regular sugar, 1 part corn meal to 3 parts flour, and 1 part yogurt whey (I was making yogurt cheese at the time) to 2 parts buttermilk.

It occurred to me, when I made these substitutions, that Susan’s philosophy has influenced me much more than I realized: I’m not even using the Five Roses muffin recipe as published. I’ve already tweaked this recipe by reducing the  sugar or using maple sugar, increasing the amount of fruit (my late mother-in-law used to say my muffins were mostly fruit, with just enough batter to hold a muffin shape), and using buttermilk instead of regular milk.

After decades of trial and error in the kitchen, I know the more we understand how ingredients and flavours work, the more we are freed from a recipe straightjacket. I’ve found my kitchen art by developing my understanding of cooking chemistry (the function each ingredient serves) and cooking math (the proportions of each ingredient needed). Getting out of the recipe straightjacket allows us to change any dish to our tastes or needs. For example, I can now create low-fat, non-wheat, dairy-free and vegetarian versions of all sorts of dishes that I wanted to keep in my repertoire. Of course, this brave experimental approach sometimes results in garbage. I once created an homage to the song “Scarborough Fair,” by seasoning sole with parsley, sage, rosemary and thyme. It tasted horrible. That day I learned delicate white fish does not want to be paired with robust, woodsy herbs like rosemary and sage. But since that combination of herbs is lovely with poultry, maybe it would work in a vegetarian stew with root veggies and great northern beans? It did. It was delicious.

So here, as a tribute to Susan, who has always encouraged me to have fun, be brave and “just try it and see,”  is my favourite fruit muffin recipe, which – in true Susan style – is not a recipe, but a set of guidelines and proportions I’ve worked out over the years. The nice thing about experimenting with muffins is that they are the most forgiving of pastries.

And those blueberry-corn meal muffins tasted sensational, by the way.

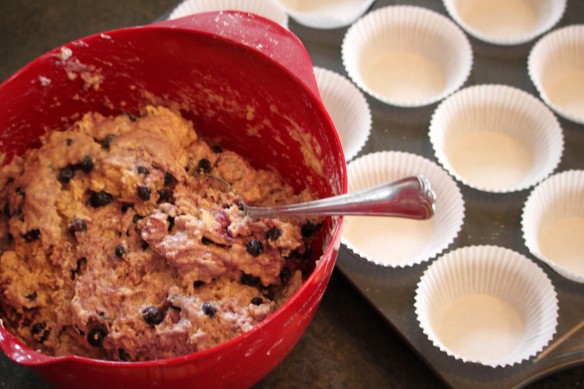
Blog blueberry muffins batter (2)

Fruit muffins (with the Five Roses Cookbook recipe as a starting place)

Ingredients

  • 3 cups flour
  • 1/4 to 1/3 cup sugar
  • 4 teaspoons baking powder
  • 1/2 teaspoon salt
  • 1/2 to 1 teaspoon spices (e.g., cinnamon, nutmeg, ginger, allspice)
  • 3 eggs
  • 1/4 cup melted butter or vegetable oil
  • 1 1/2 cups buttermilk or other milk (e.g., almond milk)
  • 1 teaspoon  vanilla (optional)
  • 1 1/2 to 2 cups fruit

Directions

  1. Blend all dry ingredients in a medium-sized bowl.Blog blueberry muffins ready for oven (2)
  2. Melt butter and mix with buttermilk.
  3. Stir in vanilla (if using).
  4. Beat eggs and add to milk-butter mixture.
  5. Pour liquid mixture all at once over dry mixture and stir gently until just blended.
  6. Scoop muffin batter into muffin tins. Many recipes suggest filling muffin tins 2/3 full; I suggest you fill them above the top (see photo above), so the muffins will be prettier and more tender.
  7. Preheat oven to 425 degrees F or 400 degrees F convect bake.
  8. Bake muffins in fully preheated oven for 14 to 20 minutes. Muffins are done when tops are golden. You will probably need the full 20 minutes if you used lots of fruit.


Tips for variations

Flour: I usually use Five Roses Never Bleached all-purpose flour or a mixture of wheat flour with spelt, kamut or oat flour. If I use whole-grain flour, I reduce it by 1 ounce for each cup of flour and increase the baking powder by 1/2 teaspoon. I find that up to 40% whole grain flour or cornmeal doesn’t really affect texture much. Spelt and kamut are silkier than wheat, so the resulting dough or batter is softer and stickier. Resist the temptation to add more flour! The muffins will be fine, though easier to manage if cooked in paper muffin tin liners.

Sugar: I substitute brown sugar or maple sugar for white sugar. We use a lot of maple sugar at our house, which we often buy at Acadian Maple Products. Maple sugar is good with everything, but especially nice with apple and rhubarb, and brown sugar is lovely with peaches. If you use honey or maple syrup, the texture of your muffins will change (they will rise less, for one thing), but they will still be tasty. Cut back your milk by 1/4 cup.  I do take into account the relative sweetness of the fruit, adding a little less sugar for peach muffins, for example, and more for rhubarb.

Butter or oil and nuts/seeds: I usually use melted butter, but vegetable oil, or nut or seed oil work well, too. I don’t often put nuts or seeds in my muffins because Adrian doesn’t care much for them, and there are some nut and seed allergies to consider, but I have put slivered almonds in peach muffins and topped cherrry muffins with roasted hazelnut dust – both tasty additions.

Toppings: You can put a topping on muffins. Brush the cooked muffins, when they are still warm, with a bit of melted butter, and then roll them, top-down, on cinnamon sugar, or powdered or chopped nuts. I have given apple-spice muffins with a cinnamon-sugar topping as a gift, and they are always a hit.

Using fruit in muffins

Fruit: Most fruits work better in this recipe if they have been cooked down or roasted first (see below). As I said, I love to really pack the fruit into my muffins, which means the muffins take a little longer to cook. If you open one up fresh from the oven, and it is not quite cooked in the centre, put the muffins back in the warm oven (still in the muffin tin), with the oven off, for another 5 minutes.

Cooking down fruit: This works well for apples, peaches, nectarines and apricots. Peel and dice the fruit and cook it, uncovered, in a small saucepan, along with a bit of water, a bit of maple syrup, boiled apple cider and apple-loving spices, such as cinnamon, cloves, allspice and nutmeg, or peach-loving spices such as ginger or cinnamon. Cook the fruit until it is soft and the liquid has reduced down to the consistency of thin syrup. If you want to cook fruit until it is just tender, strain and measure the liquid in the saucepan, and replace that amount of buttermilk in your recipe with the fruit cooking liquid. I generally use 3 or 4 apples or peaches per batch of muffins, depending on the size of the fruit. When it comes to the best variety of apple for muffins, I like Macintosh, Granny Smith, Northern Spy and Cortland, but I’d say anything except Delicious or Golden Delicious works. A combination of different apple varieties is great in late summer/early fall, when there are so many fresh apples to choose from.

Roasting fruit: Clean and cut fruit (e.g., strawberries, peaches, rhubarb, cherries) into bite-sized pieces. I usually roast mine in a pyrex cake pan, which is easily cleaned. Allow 2 cups of fruit for every 1 cup of finished roasted fruit. Add a bit of sugar to taste (I use very little, but Adrian prefers more) and roast in a 350-degree F oven until fruit is falling apart and juices have been fully released. Stir in cornstarch (about 1 tablespoon for every two cups of raw fruit) and return to oven for 15 to 20 minutes. Your finished product should be about the consistency of canned cherry pie filling – but it will taste much, much better!

Raw fruit: Rasberries, blackberries and wild blueberries can be used fresh or frozen. Just toss the fruit with about a teaspoon of flour for every cup of fruit before adding to the batter. A mixture of rasberries and blueberries makes very pretty and tasty muffins.

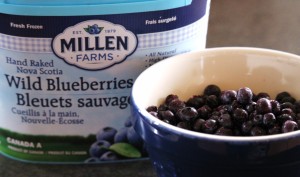
When these various fruits are in season, I prepare batches of them according to how we use them (e.g., cooked peaches, roasted strawberries or fresh blueberries) and put Blog Millen farms blueberriesthem in freezer bags in 1-cup or 2-cup batches. They don’t take up much room and are delicious in so many things. Here in Nova Scotia, I don’t have access to my freezer of fruit, so I bought a container of local frozen blueberries from Millen Farms. I got a 1 kg tub for less than I would have to pay in Ontario for fresh wild blueberries in season, and they are perfect – firm, ripe berries with no twigs or leaves to sort and discard, and really nice flavour. These are a great find, and I’m supporting a local food producer – I know Susan will approve!


Sharon lives in Kingston, Ontario, and Hacketts Cove, NS, and is grateful for everything she learned from her big sister.
Welcome to our family’s discussion forum on food. If you’d like to submit a post, please consider yourself family, and email us at familyfoodforum@gmail.com.

After a good dinner, one can forgive anybody, even one’s own relations.”

– Oscar Wilde, A Woman of No Importance

Link

Sharon Jessup Joyce

Fresh haddock is delicious. And here on Nova Scotia’s South Shore, haddock is the fish you will find most often on restaurant menus. Olivia is particularly fond of the haddock taco at Two Doors Down in Halifax, while I love their haddock burger, sans bacon, topped with their addictive housemade green relish. We regularly enjoy classic fish and chips at Shaw’s Landing in West Dover, while Rhubarb, located in Indian Harbour (just 4 minutes from our house), offers a delicious gluten-free fish and chips. This week, when Diane treated Livy and me to lunch at Rhubarb, I substituted a side salad for the fries and still walked away well satisfied because of my generous portion of fish.

Haddock is served (better)

But perhaps the most classic way to serve haddock is pan-fried. You can get pan-fried haddock done very well at lots of restaurants on the South Shore, but two places where we order it regularly are at the Seaside Shanty in Chester Basin and at Athens in Halifax. Pan-fried haddock is also easy to do at home. It’s all about buying the nicest, freshest haddock you can find — fortunately plentiful in this region — and not overcooking it.
Haddock in milk (better)
Pan-fried haddock

Ingredients (serves 2)

  • 4 small or 2 large haddock fillets
  • Enough milk to cover fish (about 1 cup, usually)
  • Enough flour to coat fish (I use about 1/2 cup and waste a little)
  • Seasoning of your choice (Old Bay is classic, but I have used Sarah’s Sea Salt’s Tuscan Salt, Cajun spice mix, steak spice or just salt and pepper)
  • 2-3 tablespoons oil for frying (I use sunflower oil)
  • Fresh dill and/or chive and lemon wedge as garnishes

Directions

  1. Lay fish pieces in flat baking dish — I usually use a cake pan — and pour enough cold milk over them to barely cover.Haddock in flour (better)
  2. Let fish sit in milk in fridge for 20-30 minutes.
  3. Mix flour and desired seasonings together and spread out on plate or flat dish.
  4. Put oil in skillet and bring slowly up to medium-high heat.
  5. Drain milk from fish. At this point, you can pat the fish dry with paper towels or leave it slightly damp with milk. Drying the fish gives you a thinner coating of flour, while leaving it damp means you have a crunchier coating (and you will use more flour, so add a bit to your coating container).
  6. Place coated fillets gently into hot oil, being careful not to break fish.
  7. Cook on one side for 1-2 minutes (depending on thickness of fish), then turn gently and carefully, using a heat-proof spatula or pancake flipper. Don’t worry if the fish piece breaks in half when you are turning it.
  8. Cook on the other side for 1-2 minutes.
  9. Remove fish from oil and place on plate covered with double-thickness paper towel. Gently pat off excess oil.
  10. Serve immediately.Haddock in skillet (better)If you don’t eat wheat, substitute the flour of your choice. You don’t even need flour. Corn meal gives a lovely crunchy texture, as do crushed potato chips. You can even omit the coating and just sprinkle the fish with your favourite seasoning and fry it that way.

The fishmonger at Pete’s in Halifax gave me another soaking tip. Instead of milk, soak fish in slightly salted ice water. I tried it, and found that it firmed the flesh as well as the milk, but reduced the browning of the fish fillet’s crust, since the sugars in the milk promote browning. You will definitely need to pat the fish dry if you use the salt water instead of milk for soaking.

Pan-fried haddock should be eaten right away. In theory, you can keep cooked pieces warm in the oven while you cook more fish, but in reality the kept-warm portions will be as disappointing as waffles or latkes given the same treatment. When I make pan-fried haddock, I ask each person to start eating as soon as they get their plate filled. I don’t usually have to ask twice.

Gorgeous morning


Sharon lives in Kingston, Ontario, but is presently spending the month at the family’s Nova Scotia coastal cottage, from which her husband will have to forcibly remove her.
Welcome to our family’s discussion forum on food. If you’d like to submit a post, please consider yourself family, and email us at familyfoodforum@gmail.com.

After a good dinner, one can forgive anybody, even one’s own relations.”

– Oscar Wilde, A Woman of No Importance

Easy baked chicken, two ways

Sharon Jessup Joyce

St Margarets Bay on a sunny spring Friday

Welcome to Season 2 of Always a Good Dinner!

Okay, that isn’t quite what happened, and I know this isn’t a television show. I admit it, I got busy — and I guess everyone else did, too — and I neglected this blog. But now that we’ve all survived a long, cold winter and local garden bounty is just beginning, maybe we can gather around the blog once a week to share some more stories, recipes and photos.

Today’s post is not inspired, but it’s practical. I’m alone at the Nova Scotia house for the week, and I want to spend less time cooking and more time walking the dog, reading, knitting, sewing, writing and enjoying scenes like the one above, from our deck off the kitchen. I turn out to be one of those people who loves to cook for others and can’t be bothered cooking for herself. But chicken and [insert your preferred sides] usually appeals to me, and I’ll do it for myself if I can cook up a lot of chicken and freeze it in a format that reheats well. Fortunately, boneless, skinless chicken breasts were on sale at our local Atlantic Superstore  — or Loblaws, as we call it in Ontario — so I picked up eight and used ingredients I happened to have on hand to bake the chicken two ways. I know the first dish features fall flavours, but I wanted to use up ingredients I had languishing in the fridge (another downside to cooking for one).

Chicken breasts, apple and onionBaked chicken with apple and onion

Ingredients

  • 2 tablespoons olive oil
  • 4 boneless, skinless chicken breasts, trimmed of icky bits
  • 1 cooking or white onion, thinly sliced
  • 2 garlic cloves, crushed or diced (optional)
  • 3 apples; I used Macs, because that’s what I had on hand
  • Several leaves fresh sage; I used rosemary, since I had no sage, but this dish is better with sage
  • Several sprigs fresh thyme (be more generous with the thyme than with sage or rosemary)
  • 2 tablespoons Dijon mustard
  • 1 tablespoon apple cider vinegar
  • 1/4 cup boiled apple cider
  • 1 ounce Calvados (French apple brandy)
  • Salt and pepper

Directions

  1. Brush sides and bottom of baking dish with about 1 tablespoon olive oil.
  2. Slice onion, dice garlic and slice peeled apples; lay in layers on bottom of dish.
  3. Lay herbs on top of onion and apple slices.
  4. Lay chicken breasts on top.
  5. Mix remaining olive oil, mustard, vinegar, cider and Calvados and pour over chicken.
  6. If desired, season with salt and pepper.
  7. Bake, covered, in a 350 degree oven for about 30-35 minutes; remove cover and turn chicken breasts over (don’t worry if other components are disarranged) and bake for another 10 minutes.

You can refrigerate this for 3 days, or package it up right away for the freezer. When you reheat this dish, pick out and discard sage leaves and thyme twigs, and set the chicken aside. Mix about a tablespoon of corn starch with about 1/4 cup chicken stock, cream or more cider with Calvados (about half and half) and add to the saved pan juices, apples and onions. Pour the mixture over the chicken breasts and heat for about 20 minutes in a 325-degree oven. This is really nice with mashed potatoes and a little salad, but it goes with lots of things. If you eat it by itself, which I did today, you can call the onion and apple slices your side dish.

Chicken breasts with southwest flavours

Baked chicken with southwest flavours

No recipe is required for this dish. I brushed a baking dish with olive oil. Then I diced some leftover items from the fridge: a jalapeno pepper, half a sweet red pepper, half an onion and a handful of cilantro. I put the chicken pieces (breasts sliced in 3-4 pieces and tenderloins, so all the pieces would be about the same size) on top of the veggies. I brushed the pieces with a bit of olive oil and squeezed the juice of one-half lime over them. Then I sprinkled the chicken with salt, pepper, chipotle chili powder and just a bit of maple sugar. I baked the chicken, uncovered, for 30 minutes in a 350-degree oven. Again, I kept all the pan juices and veggie bits when I packaged the chicken in bags for the freezer.

You can do about a million things with these southwest chicken pieces. My favourite is to serve them over rice and corn with a dollop of sour cream, a spoonful of homemade salsa, a sprinkle of fresh cilantro, diced scallions and just a squeeze of lime.

And the crows love the chicken scraps, as you see. Here is today’s sentry, who has called the flock, but lands first to score the biggest piece.

Crow swoops in for chicken closeup


Sharon lives in Kingston, Ontario, but is presently spending a month at the family’s Nova Scotia coastal cottage, and promises to post a fish dish soon.
Welcome to our family’s discussion forum on food. If you’d like to submit a post, please consider yourself family, and email us at familyfoodforum@gmail.com.

After a good dinner, one can forgive anybody, even one’s own relations.”

– Oscar Wilde, A Woman of No Importance

Classic pumpkin pie

Alana Hardy

Thanksgiving may be long past, but it’s still pumpkin season, right? Perhaps you have a Jack O’Lantern whose services are no longer required. Or maybe you bought a can of pure pumpkin on a whim. Or you have a butternut squash you don’t know what to do with (trust me, no one will know the difference once the squash is cooked, mashed and spiced up with cinnamon and nutmeg!). What better thing to make than pie?!

Blog Alana's pie

Pumpkin pie is my favourite and has been for some time. But I’m very finicky (and a bit of a snob) when it comes to pumpkin pie. Not just any pie will do. I’d rather go without than eat a store-bought pie. It took me years to figure out why a grocery store pie wouldn’t cut it. Initially I thought it was the pastry, but that turned out to be only part of it. The filling always lacked something, and I eventually put my finger (or tastebuds?) on it. Molasses. Many pies (homemade and storemade) don’t contain molasses. As a result, I think they lack the depth and nice, rich colour of the pumpkin pies my mom would make for Thanksgiving.

If you’ve been exposed to from-scratch pies and other baked goods, you know that anything made in a grocery-store kitchen is not likely to measure up. My mom never bought pie shells. Pastry was always made at home. I’m not loyal to a particular pastry recipe, and I usually just take a look through my cookbooks for a recipe that will make enough for a single crust (my mom swears by the recipe on the Tenderflake box, which makes enough for three double-crust pies. I love pie, but that’s a lot for a gal to consume, even if I freeze some of the pastry! And even if I have the help of my fella, Tim, to eat them!). This time, I halved a recipe from Deb Perelman’s The Smitten Kitchen Cookbook. I like her blog and thought I’d give this all-butter pastry a go. While the end result wasn’t as light and flaky as I’d hoped, I’d try it again. Her recipe can be found here: http://smittenkitchen.com/blog/2008/11/pie-crust-102-all-butter-really-flaky-pie-dough/.

Now, the main event: the custard filling. My mom’s recipe, which is the one I always use, came from a cooking encylopaedia set we had at home. It’s simple and yields a deliciously smooth and creamy pie.

Pumpkin pie filling ingredients

2/3 cup firmly packed brown sugar

½ tsp salt

¼ tsp ground cinnamon

½ tsp ground nutmeg

3 tbsp molasses

1 ½ cup mashed, cooked pumpkin

2 eggs, beaten

1 cup milk

1 cup light cream (I used 18% table cream this time, but have used 10% and 5% in the past)

Mix everything together in a blender and pour the filling into your pastry-lined pie plate. You’re going to have more than will fit (don’t overfill! It WILL get messy!). If you have any scraps left from trimming your pastry, you might be able to make some small individual pies. Otherwise, pour the custard into small ramekins and bake along with the pie. You could place them in a bain-marie, if you like. They tend to get a little dry if you don’t. But they still taste good! I suppose that if you didn’t want to go to the trouble of making pastry, you could bake all the filling this way. Now that’s a thought…

I usually put the pie plate on a cookie sheet (before filling),. This makes it easier to transfer the pie to the oven, and catches any mess in case othere is some overflow. Place the pie in a 500°F oven for 8 minutes, then reduce the heat to 325°F and bake for 55-60 minutes longer, or until a knife inserted into the filling comes out clean. I find that I usually end up baking it for an extra 10 minutes, until the centre doesn’t jiggle too much. If you’ve blind baked your pastry shell, place the pie in a 325°F oven and bake for 55-60 minutes.

Serve with whipped cream, if you wish, but I like to enjoy it all on its own.

Alana lives in Ottawa, Ontario, with her two adorable cats. She loves baking and is usually thinking about her next meal.
Welcome to our family’s discussion forum on food. If you’d like to submit a post, please consider yourself family, and email us at familyfoodforum@gmail.com.

After a good dinner, one can forgive anybody, even one’s own relations.”

– Oscar Wilde, A Woman of No Importance